

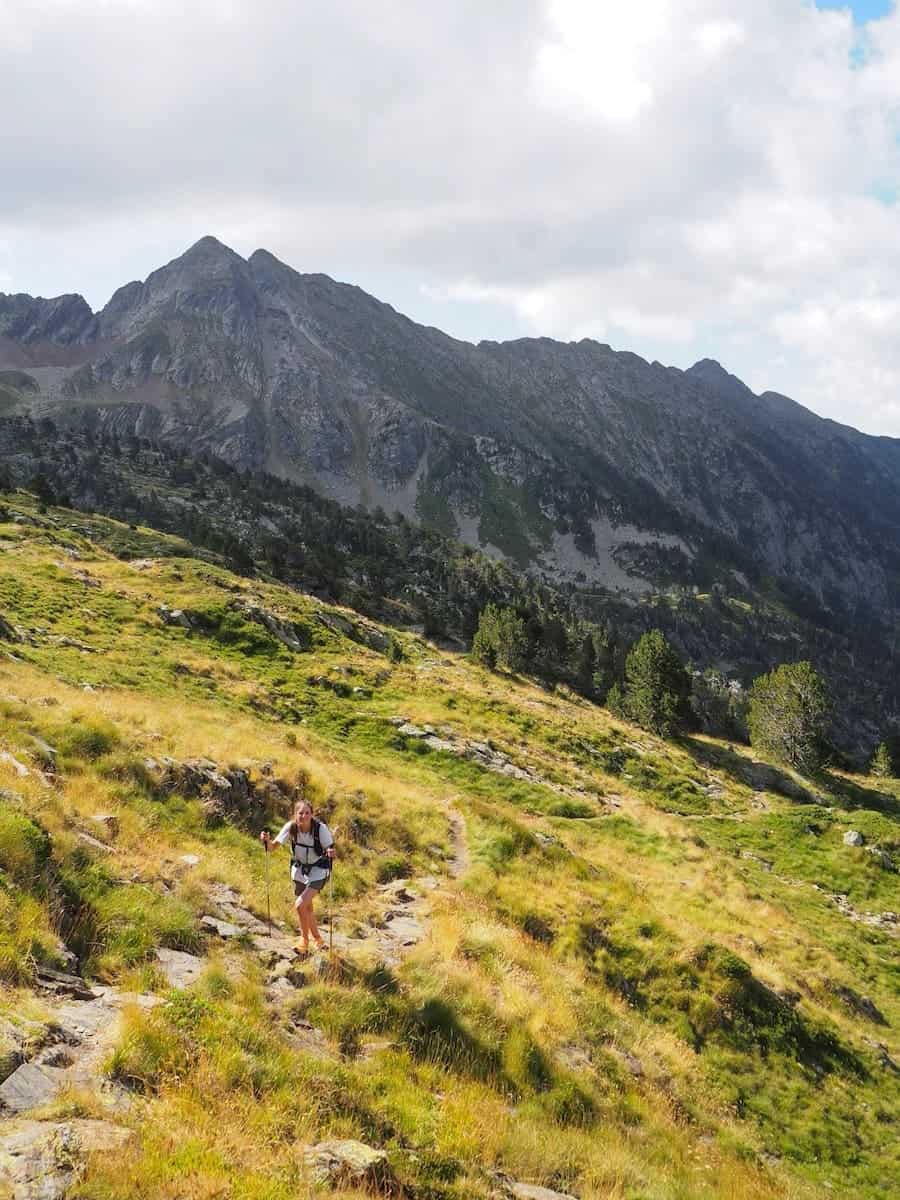
Rugged 3000-m peaks, crystal-clear alpine lakes, grassy meadows, and jaw-dropping views – La Porta del Cel is an incredible multi-day hike in the Catalan Pyrenees that we’ll remember for a long time! The route takes place at high altitudes, making it an exciting adventure for seasoned hikers and experienced mountaineers.
The circular journey links four mountain huts in the Catalan and French Pyrenees, so you’ll be hiking in two countries!
La Porta del Cel (literally “The Door to Heaven”) covers over 60 km and climbs the impressive Pica d’Estats, the highest peak in the Catalan Pyrenees.
It can be completed in 4 and a half days and starts at Tavascan, a beautiful mountain village three and a half hours from Barcelona. Each day, you hike to a mountain hut with basic facilities, including a bed, shower, and delicious food.
We hiked La Porta del Cel in August 2023 with some family members, completing it in 4.5 days.
Here are our reviews, tips, and photos to help you plan your Porta del Cel adventure.
* Post written for the first time in August 2023 and updated in March 2026.
Things to know before hiking La Porta del Cel
Technical details
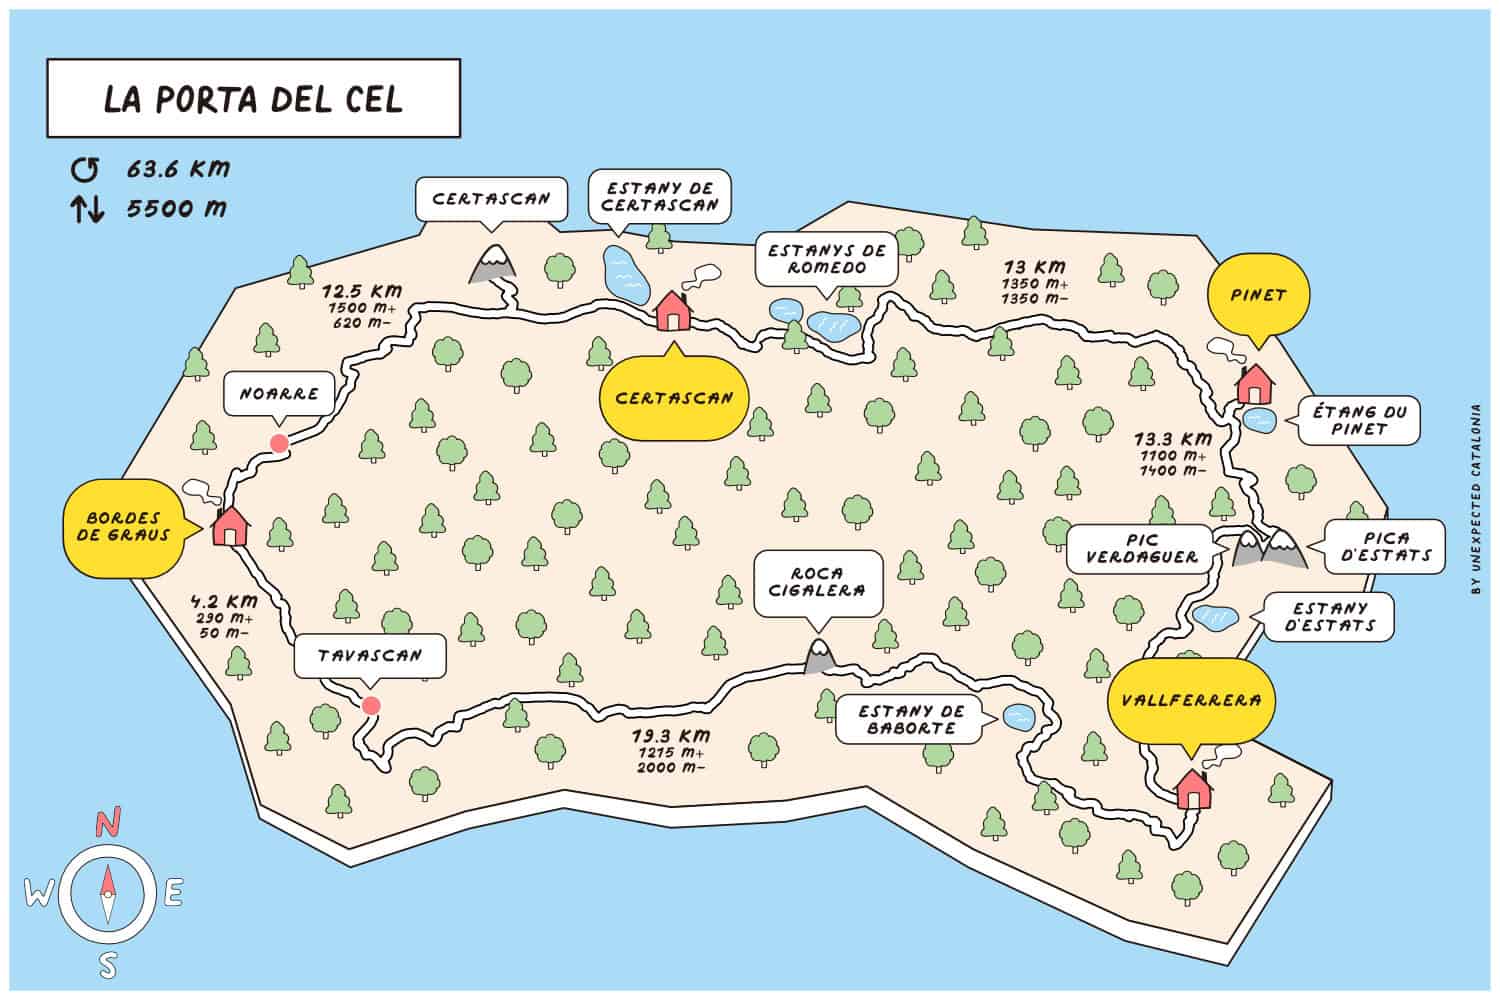
🥾 Total distance: 63.6 km
🔴 Difficulty: Challenging
⬆️ Cumulative elevation gain: 5.500 m
⏱ Duration: 4.5 days
🗓 Recommended season: La Porta del Cel is a high-mountain route, so the best time to enjoy it is from mid-June to the end of September.
The route is graded “challenging“, which we think is accurate. We regularly hike and found the track challenging because of the distance and elevation, but it isn’t technically difficult.
We recommend this route to people who are used to hiking, in good shape, and willing to hike 15-20 km each day with 1.000-1.500 m of elevation gain.
If you don’t have experience with long hikes, we think it’s better to do some easier hut-to-hut hikes before embarking on this adventure.
Also, most stages of La Porta del Cel take place in high-mountain terrain, so having the proper knowledge and gear is essential. Weather conditions can change suddenly, and depending on the conditions, technical gear such as crampons, rain jackets, or walking sticks may be needed.
👌🏼 Our tip
If you have the chance, September is a great month to do this hike, as it isn’t as crowded as in the summer.
Where does the route start?
The route can be started from 2 different points: Tavascan (Spain) or Marc (France).
It takes about 3 h 40 min to drive from Barcelona to Tavascan, and 4 h 10 min from Girona. There’s free parking right in the village. The Porta del Cel route passes by Tavascan, so you won’t need to hike any extra km if you start from here.
From Marc, in France, you have to hike for 3.5 hours to reach the Pinet hut, one of the huts that the route passes.

Reaching La Porta del Cel by public transport
From Barcelona, it’s possible to reach Tavascan by public transport.
First, you need to take a bus from Estació del Nord (in Barcelona) to Llavorsí. The ride takes around 5 hours, and only one bus runs daily.
The second part of the journey is a taxi from Llavorsí to Tavascan. You have various taxi options to get from Llavorsí to Tavascan. Just make sure you book them in advance by phone.
Which direction is best to follow?
Since it’s a circular track, it can be done clockwise or counterclockwise.
However, we recommend clockwise because the section from the Vallferrera hut to Tavascan is very long, and doing it uphill would be pretty tedious (2.000 m of elevation gain). Also, there’s a scree on the Catalan side of the Pica d’Estats that is very monotonous, so we think it’s better to descend it than ascend it.
Here’s a map showing the various mountain huts, their altitudes, elevation gains, and distances between them to help you better plan your approach to this route.
How many days do you recommend?
La Porta del Cel route is designed to be completed in 4 and a half days. Except for the first section, the rest are all between 10 and 20 km with more than 1.000 m of elevation gain.
One of the cool things about this hike is that you climb Catalonia’s highest peak along the route, La Pica d’Estats. On the same hike, you can also climb nearby mountains, like Verdaguer or Montcalm.
To us, the best way to plan this hike is this:
- Day 1: Travelling from your destination to Tavascan and hiking the first stage (Tavascan to Bordes de Graus)
- Day 2: Hiking the second stage (Bordes de Graus to Certascan)
- Day 3: Hiking the third stage (Certascan to Pinet)
- Day 4: Hiking the fourth stage (Pinet to Vallferrera)
- Day 5: Hiking the fifth stage (Vallferrera to Tavascan) and sleeping in Tavascan
- Day 6: Travel back to Barcelona or whatever your destination is
If you reach Tavascan by car, you could skip Day 6 and return to Barcelona or your destination on Day 5. However, hiking and travelling on Day 5 would be impossible if you travel by public transport.
Therefore, adding an extra night in Tavascan is the wisest option. Also, it’s a great way to discover the village, eat well, and rest before continuing your trip or returning home!
Is the route marked?
The route is signposted with various markings, such as yellow lines, points, and red-and-white lines.
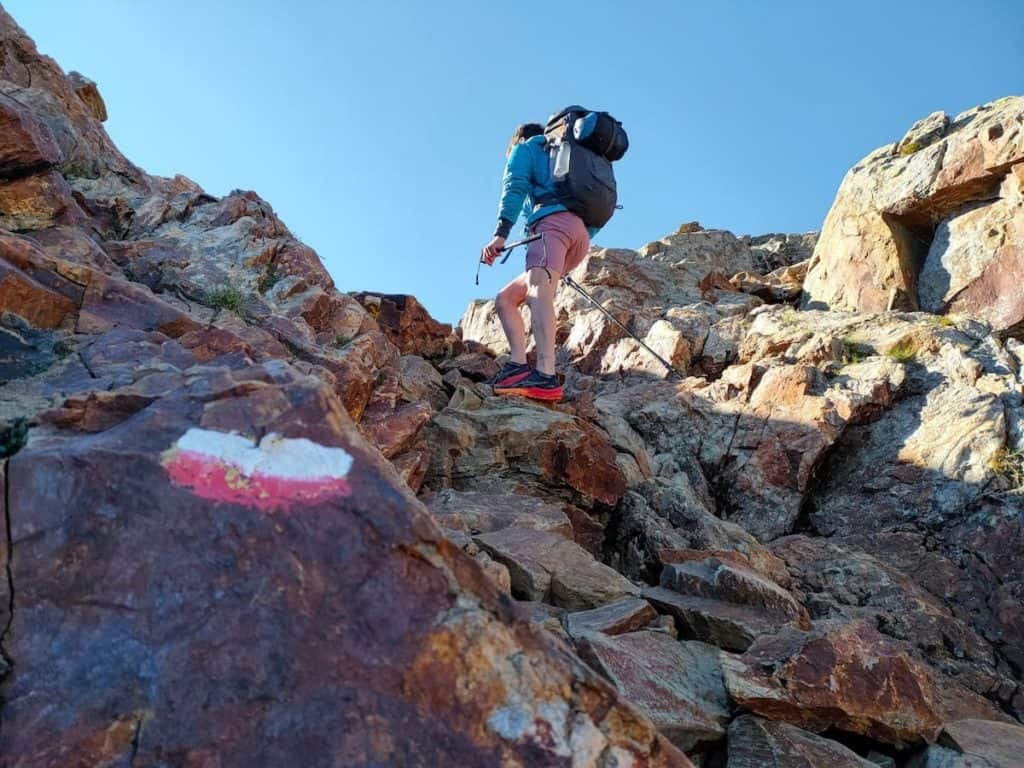
Following the track at some points can be tricky, like when reaching the Pinet hut. So, it’s crucial to pack a map of the area and also download the GPS track of the route. You’ll get a map of the route when booking the hike online.
🧭 Wikilock track
If you want to download the track, here’s the Wikilock track of the route.
The huts on the La Porta del Cel route
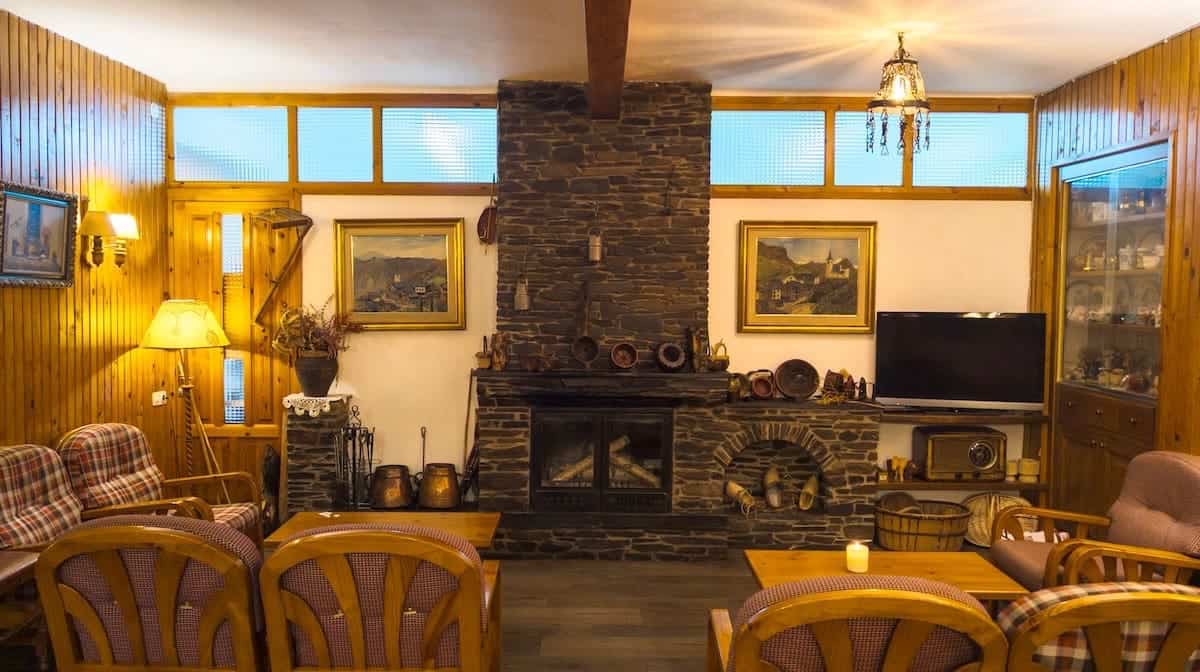
The four huts in the area (Càmping Bordes de Graus, Certascan, Pinet, and Vallferrera) are located in beautiful natural settings. The huts are not mountain hotels, and their schedules and rules must be respected. For example, dinners usually start between 7 and 8 pm, so the huts recommend arriving before 7 pm.
All the huts have the essentials for spending the night: a place at the entrance to leave your backpack and boots, heating, accommodation, food, and showers (in this case, the ones at Certascan and Pinet had an extra cost).
 Refugi de Pinet
 Refugi de Vallferrera
- Refugi de Certascan
 Camping Bordes de Graus

You sleep in a bunk bed in shared dormitories, bigger or smaller depending on the hut. The mattresses are normally close to the neighbour, so try not to move much!
All the huts have blankets and pillows, so you just need to bring your own bed linen (or sleeping bag).
We wouldn’t say we’d had the best night’s sleep in a hut, as in a 20-bed room, the chances of someone snoring or moving are pretty high. Keeping this in mind is good, so you’re not frustrated or disappointed after sleeping for a few hours!
Also, keep in mind you might not be able to charge your devices in all huts. Some of them rely on solar power, so depending on the weather, there may not be a charging station available. Therefore, packing a portable charger is a good idea.
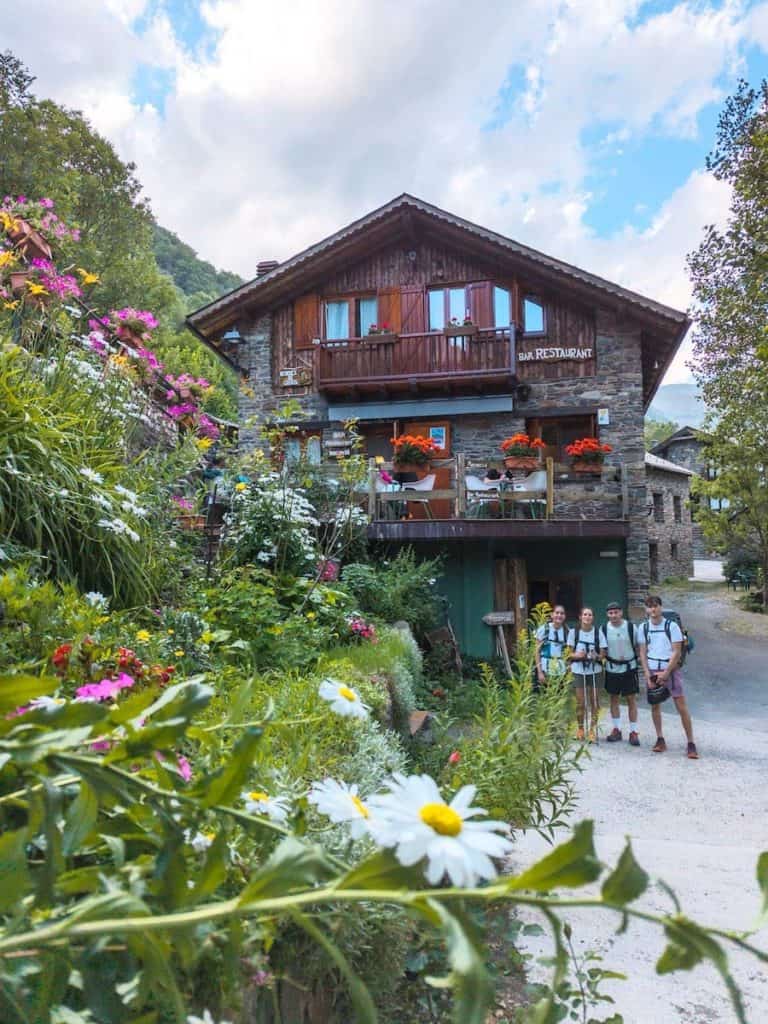
Accommodation options in Tavascan
We decided to spend a night in Tavascan the day we finished the hike, so we could rest and not have to drive all the way to Andorra after hiking for 8 hours. If you have an extra day, we highly recommend doing so!
We stayed in the Hotel Llacs de Cardós, a little hotel decorated in a mountain style in the middle of the village. You can add a night at this hotel when you book the huts online.
The dinner was good, but what we loved the most was the breakfast buffet. Such a great way to recover from all the calories burned during the hike!
Cost of hiking La Porta del Cel and how to book i Use the La Porta del Cel organisation website to book the hike.
When the booking is made, you’ll get a forfeit, which will be stamped on each hut and makes for a nice souvenir. You’ll also get the official and updated GPS track, a PDF, an app with detailed info on all the stages, a T-shirt, and a map of the route.
Booking the hike through La Porta Del Cel organisation ensures you’re secure throughout the route. The hut wardens know you’re hiking this precise route, so they alert the emergency teams if you don’t get there because of an accident.
If you find yourself in an emergency, call the number provided by the organisation. Their knowledge of the area is crucial for guiding rescue teams and saving the hikers.
👌🏼 Our tip
It’s always necessary to book the hike in advance. Also, if you choose to do it during the high season (July and August) or long weekends, you’d better book well in advance.
The cost of the hike varies depending on where you sleep and the meals you select. The approximate cost of half-board in the four huts is 280 €.
⚠️ Important!
Remember to bring cash. Most huts don’t accept card payments, so having some money with you is important if you want to enjoy a cold drink after a long day of hiking!
Gear recommendations
It’s not all sunshine and heat in the Catalan mountains! The weather can change rapidly, especially in the high mountains, as it happened to us. It was sunny and warm for the first two days, and on the third day it rained all day, with strong winds and temperatures that dropped below 0ºC.
Expect any weather and get equipped accordingly.
We recommend packing winter clothes (even though you hike in summer), a waterproof jacket, pants, a backpack cover, and safety equipment, such as an emergency blanket and a first aid kit.
Earplugs are also highly recommended; we bet you’ll appreciate them if your neighbour starts snoring!
As you’ll spend many hours hiking, it’s wise to pack light but sensibly. You’ll need to carry your own water, clothes, sleeping bag/sheets, personal items, camera, and food (depending on the meals you select when booking). You won’t need to pack a sleeping pad or more than one day’s worth of water at a time.
It’s also essential to bring a bag to put all the trash in. You can throw it at some huts or the village where you finish the route. Please take care of the environment and leave no trace.
⚠️ Important!
It’s not unusual to find snow and ice in some stages until mid-July. Contact the various huts before starting your hike to find out whether you need to pack crampons or an ice axe. If they’re needed and you don’t have them, you can rent them at the first hut, Càmping Bordes de Graus.
Phone service
There is no phone service on most of the route. It’s good to let family members or friends know you’re doing this hike, so they don’t freak out if you don’t answer them for a few hours or days.
In case of an emergency, call 112. This emergency number has good coverage throughout the first and second sections of the hike. In the other sections, coverage is limited to specific points only.
⚠️ Important!
Keep in mind that part of the route takes place in France, which might affect your phone coverage costs. If you have a SIM card from an EU country, check if roaming is included in your plan. If not, turn off the mobile data, or your trip will become more expensive than expected!
We recommend turning off mobile data when leaving the Certascan hut and turning it back on in the Vallferrera hut.
Food
🍽 Breakfast and dinner
Breakfast and dinner are served in the huts, and dinner is highly anticipated after a full day of hiking! The guards often cook three dishes for dinner, including soup, salad, a consistent dish, and a dessert. The food can vary from hut to hut, and it changes daily.
Breakfast usually consists of bread with cheese, jam, coffee, biscuits, and tea, depending on the hut.
⚠️ Important!
If you have a food allergy or dietary requirements (vegetarian, vegan, gluten-free, etc.), please say so when booking the huts. The guards will accommodate your requests and make the necessary changes.
However, remember that sometimes the hut’s resources are limited, and the special meals can be less varied. For example, vegetarians may only be able to choose between cheese and jam for breakfast. In contrast, non-vegetarians have more options, such as various cured meats.
🥪 Lunch
For lunch, you can buy it at a supermarket before starting the route or buy a picnic at the huts where you sleep. If you want the picnic, you must request it when booking. The picnic usually consists of a sandwich or cold dish, fruit, and a chocolate bar or snack.
🥜 Snacks
We also recommend you bring some extra snacks for the route, like nuts or energy bars. Think about foods that don’t spoil quickly and take up little space.
Water
When it comes to water, we recommend bringing 2 reusable water bottles, each 1 L. You can refill the water bottles in all mountain huts.
If you carry a water filter, there are plenty of streams, lakes, and rivers where you can fill your water bottle.
La Porta del Cel route
Day 1 – Chill hike and the most beautiful campsite
Tavascan to Bordes de Graus hut, 4.2 km hike, 290 m+, 50 m-
We reached Tavascan by car mid-afternoon. We left it in the free parking in the village and started the 4.2 km hike that separated us from the destination.
Before venturing into the wild, we took some minutes to explore the charming village of Tavascan. It’s a very small village, but it’s beautiful.
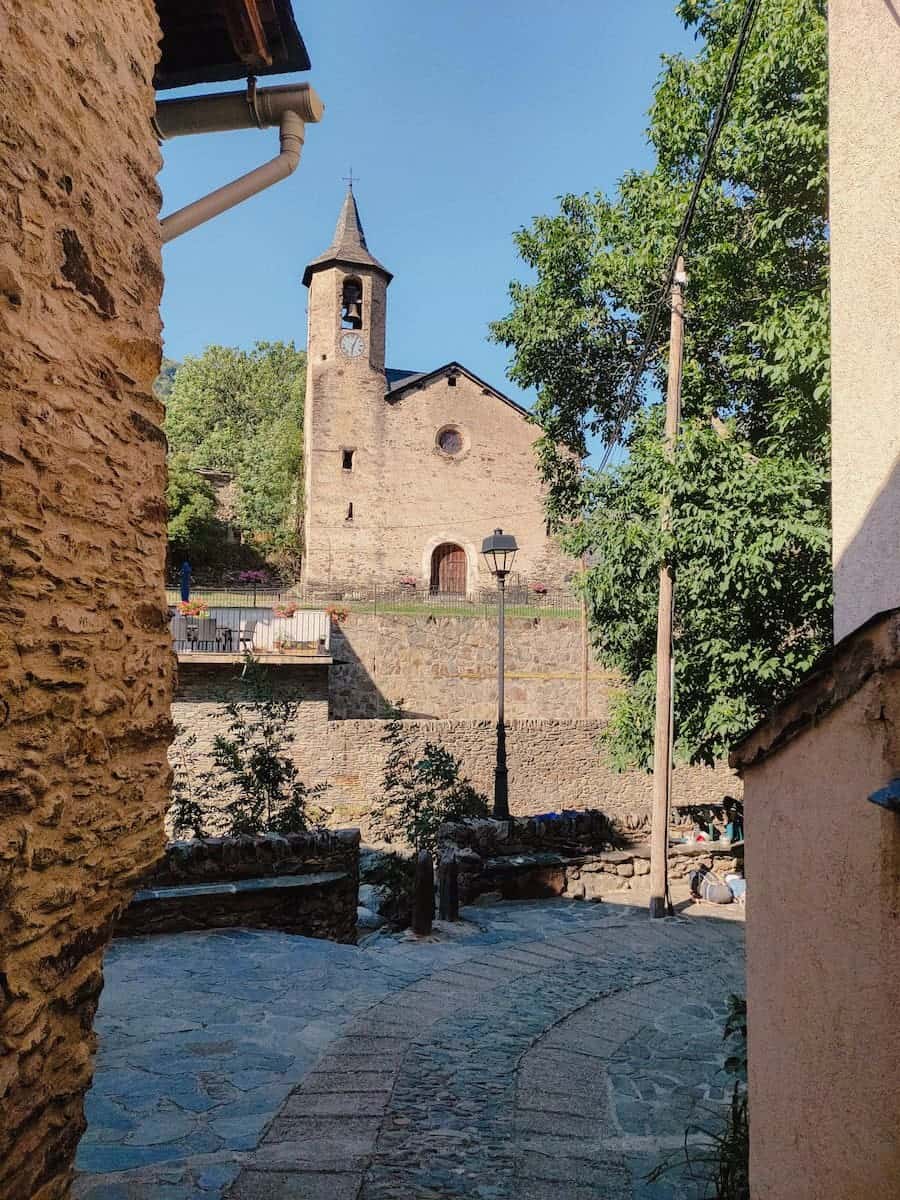
As soon as we left the village behind, we entered a forest and followed the Tavascan River. The trail gained altitude slowly until reaching the destination: the campsite Bordes de Graus.
Day 1 was definitely the shortest and easiest day of hiking, and we arrived at the campsite in one hour. We planned it this way as we thought it would be too much to drive and hike two stages in one day. Also, it gave us time to slide into the hiking mood, enjoy dinner, play board games, and catch up.
Bordes de Graus is a lovely group of houses that have been turned into a campsite. A family runs it, and it’s in a quiet, idyllic setting, surrounded by mountains and near the river.
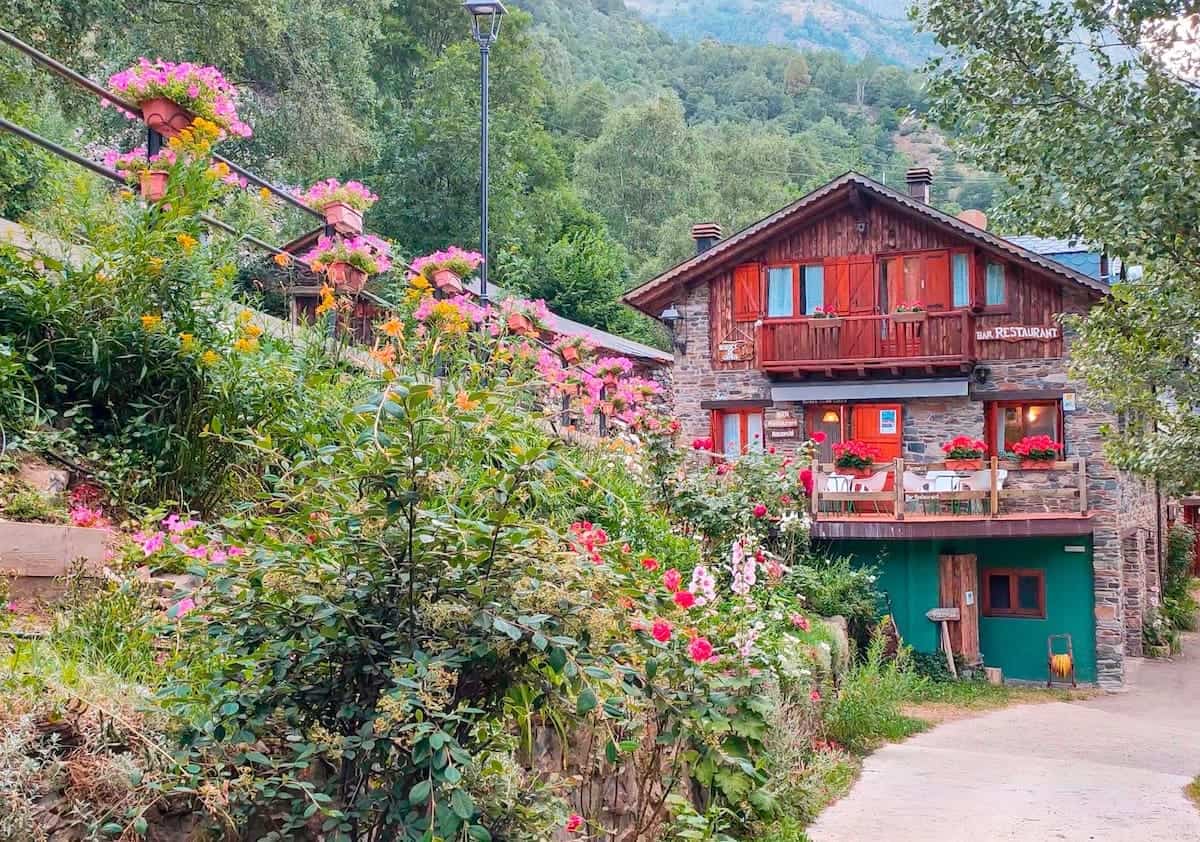
One of the houses is a hut for hikers, with several bunk beds and a shower. But hikers can also enjoy the other facilities of the campsite: the restaurant, the bar, and the common area to read or play games.
Dinner was the perfect way to end the first day of the route. We could choose between three starters, three main courses, and three desserts, and everything was delicious! Also, the people working there were super friendly.
Day 2 – From the forest to a 2.851 m high peak
Bordes de Graus hut to Certascan hut, 12.5 km hike, 1500 m+, 620 m-
After a great night of sleep (we were a few people in the hut, and no one snored!), we started the day with a fabulous buffet breakfast. There were cured meats, cheese, pa amb tomàquet (bread rubbed with tomato, Catalan-style!), yoghurt, muesli, fruit, coffee, tea…you name it.
Once finished, we started the second section of this journey. The day was sunny and clear; we hiked under a crystal blue sky for the first few hours.
The first part of the hike wound through the forest, with views of the Graus reservoir. The path gained altitude slowly, becoming more abrupt after a few km. We crossed the river through a wooden bridge, and before realising it, we reached Noarre.
Noarre is a group of mountain houses (known as bordes) used by farmers when their cattle grazed in the nearby meadows and plains. Nowadays, most houses are private property and are used as holiday homes.


Once there, we rested, ate a snack, and explored the houses around us.
The track quickly ascended through a lush, thick birch forest, zigzagging between trees and the river. After half an hour of intense climbing, we found a beautiful little waterfall, crossed the Flamisella River, and reached the incredible Guerossos plain.
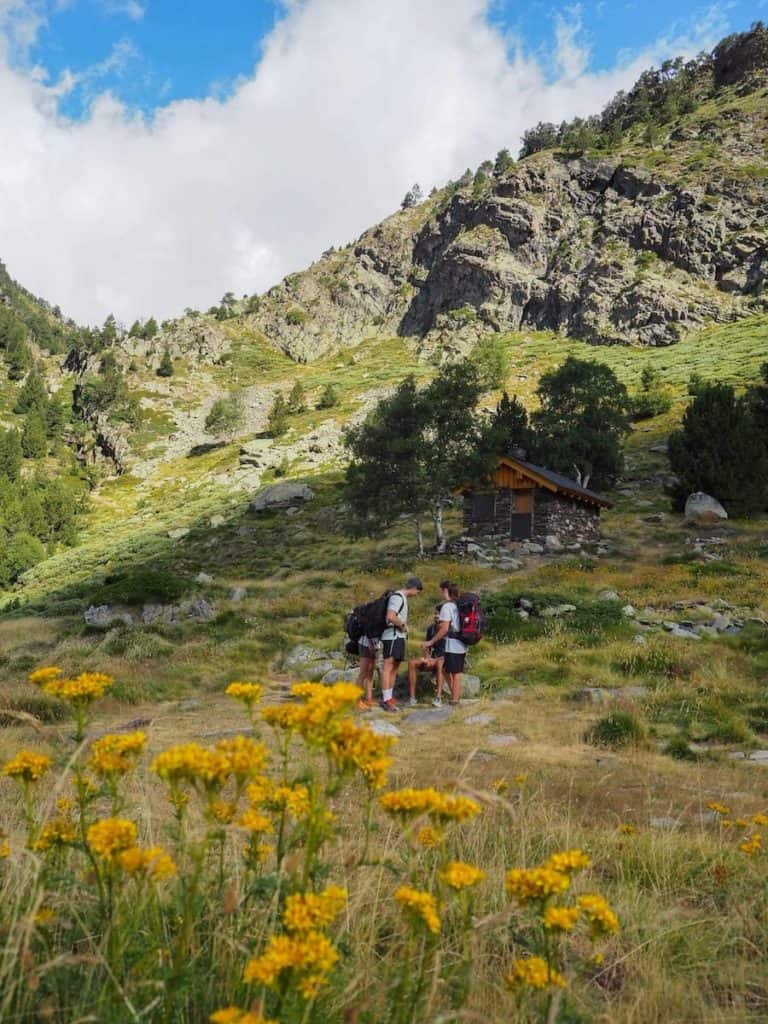
On it, there is a little non-guarded mountain cabin that hikers can use to spend the night.
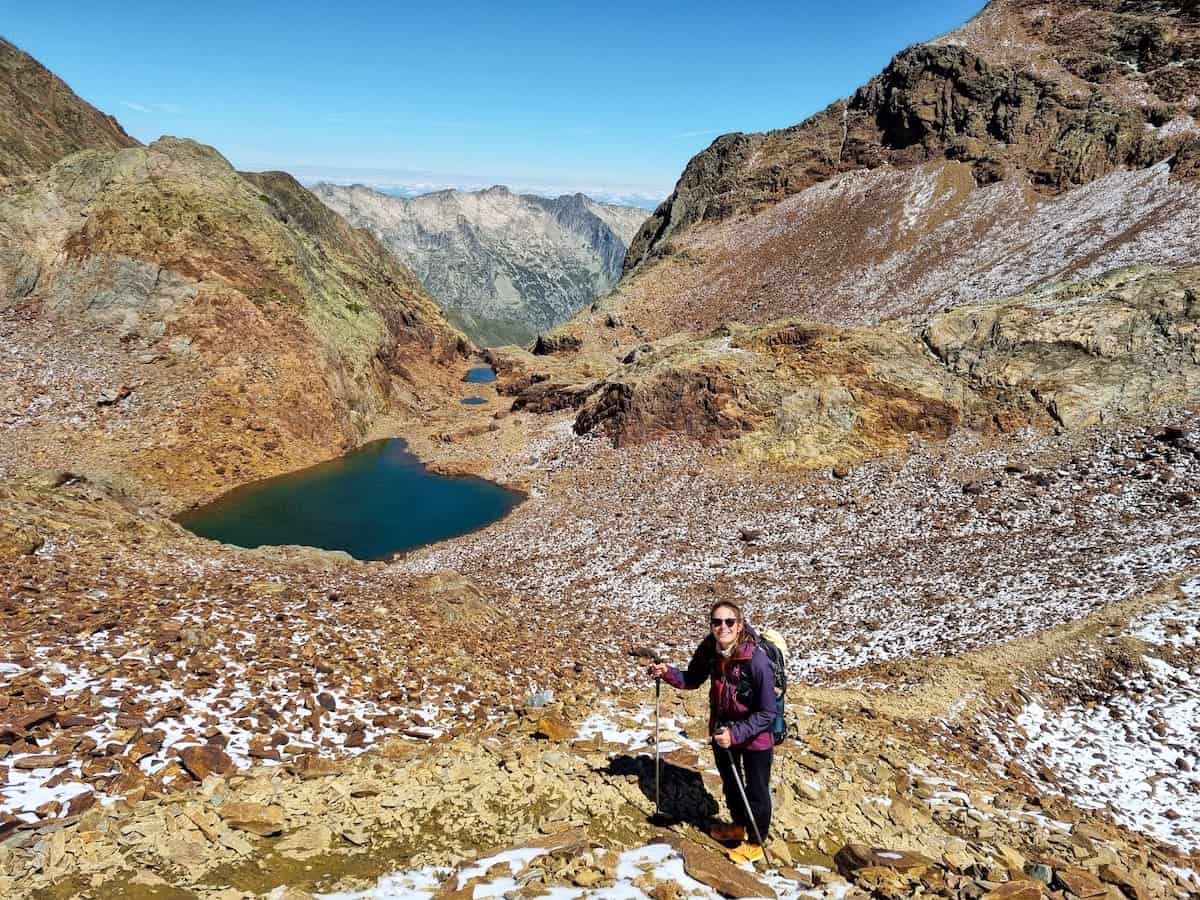
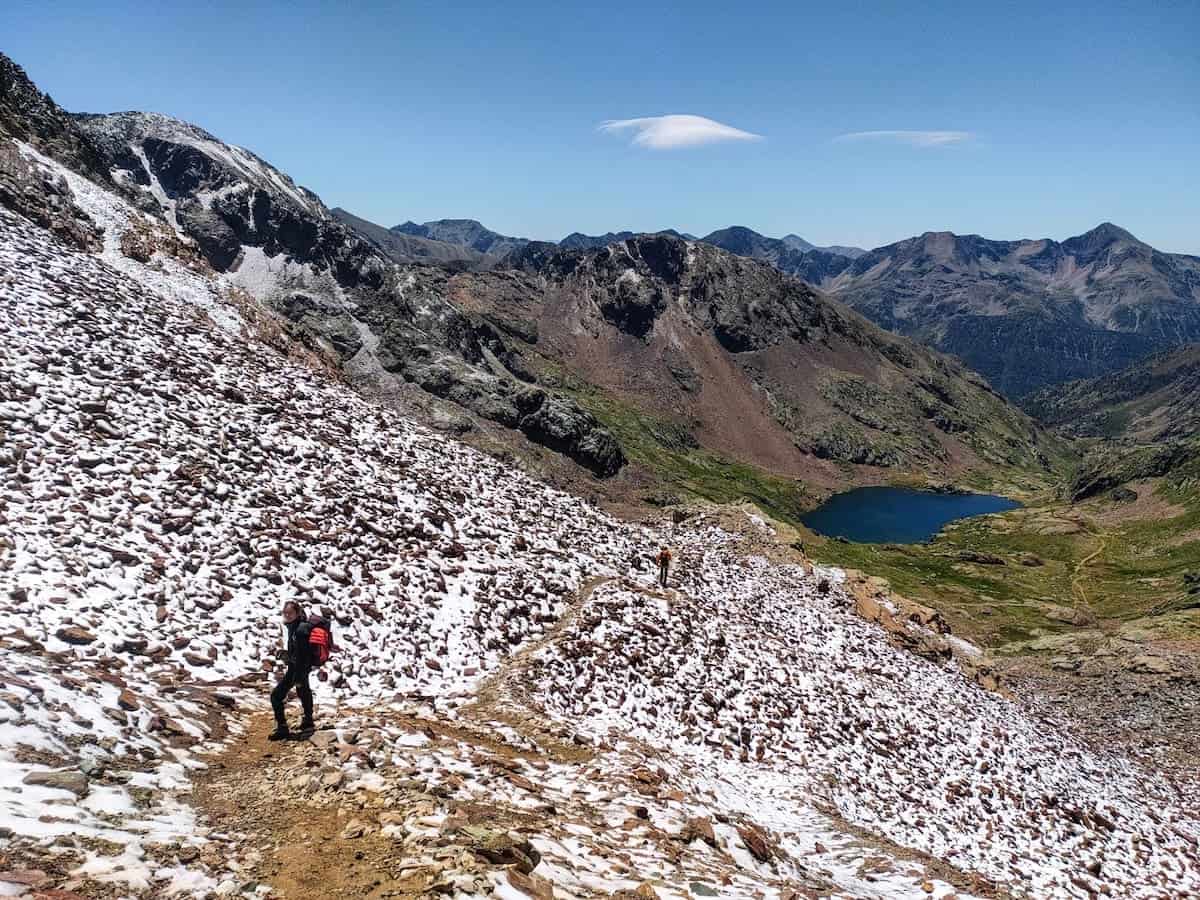
We kept ascending towards the next highlight, a set of mountain lakes. The climb was pretty steep, but luckily it wasn’t too long.
Don’t forget to turn back and admire the views of the Guerossos plain. It’s breathtaking!
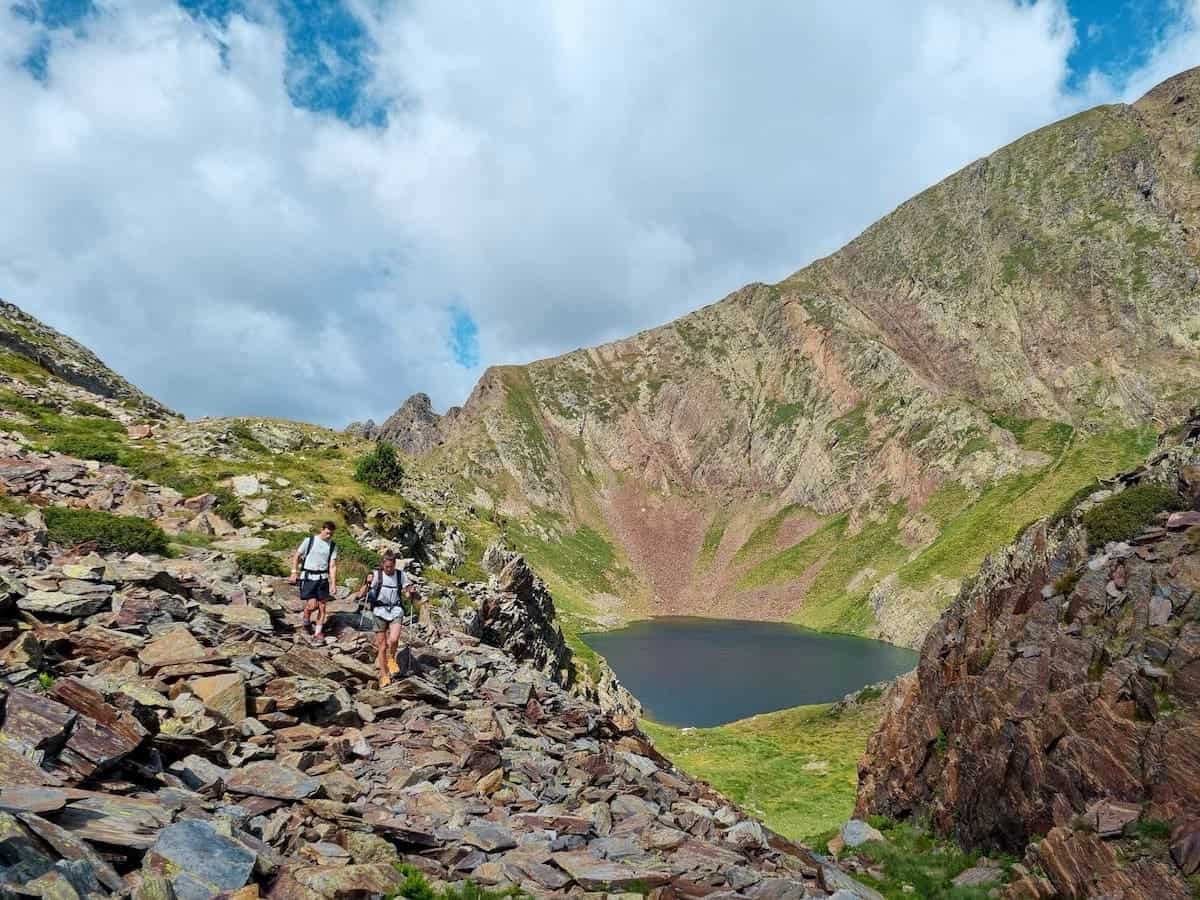
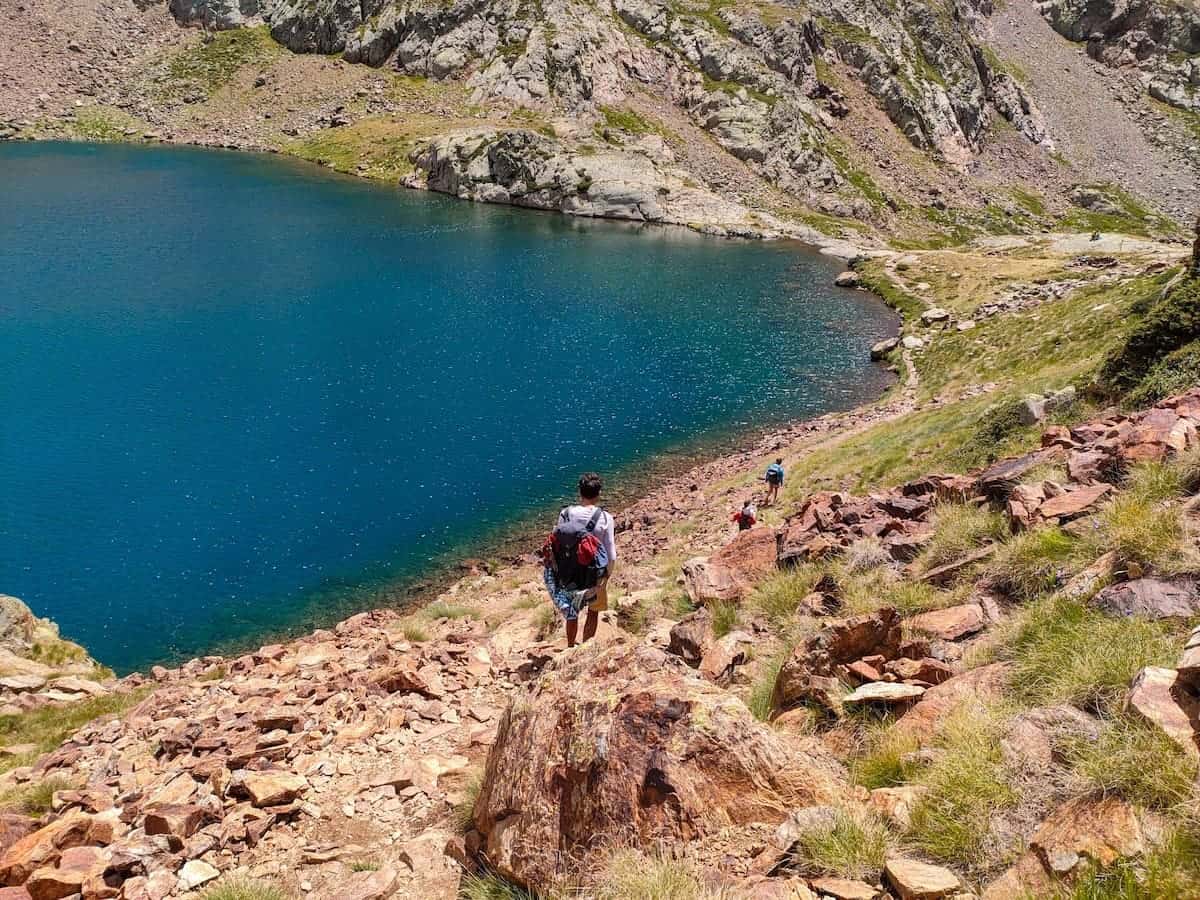
As we got closer to the lakes, we spotted a small pond and a waterfall. Some more metres and climbing, and wow! We were finally in front of the first real mountain lake on the route: Estany Blau. Its waters were turquoise, surrounded by intense green grass and rocky mountains, creating a jaw-dropping landscape.
When we kept climbing, we saw a surprise. A second lake was hidden, connected to the first one by a waterfall. The route doesn’t pass by this second lake, but if you have the time and energy, check it out!
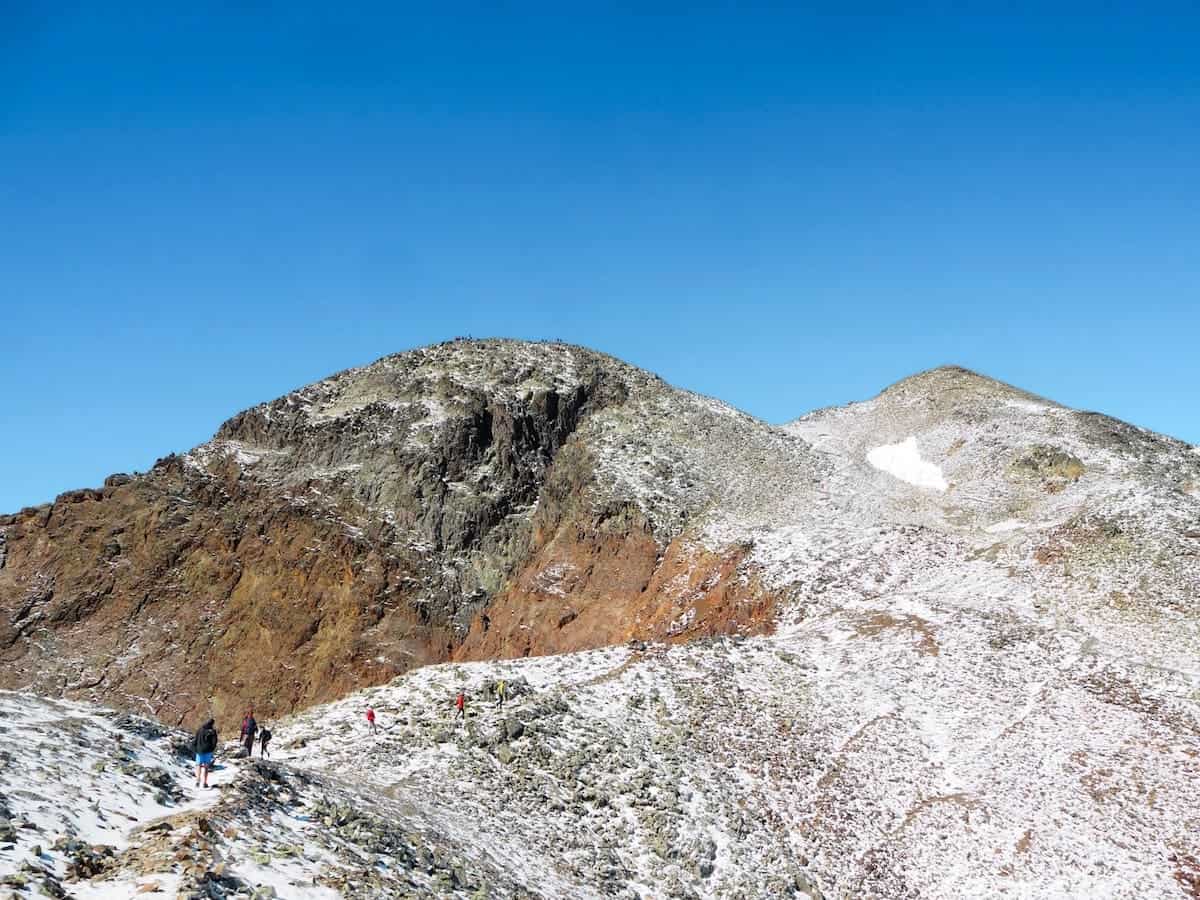
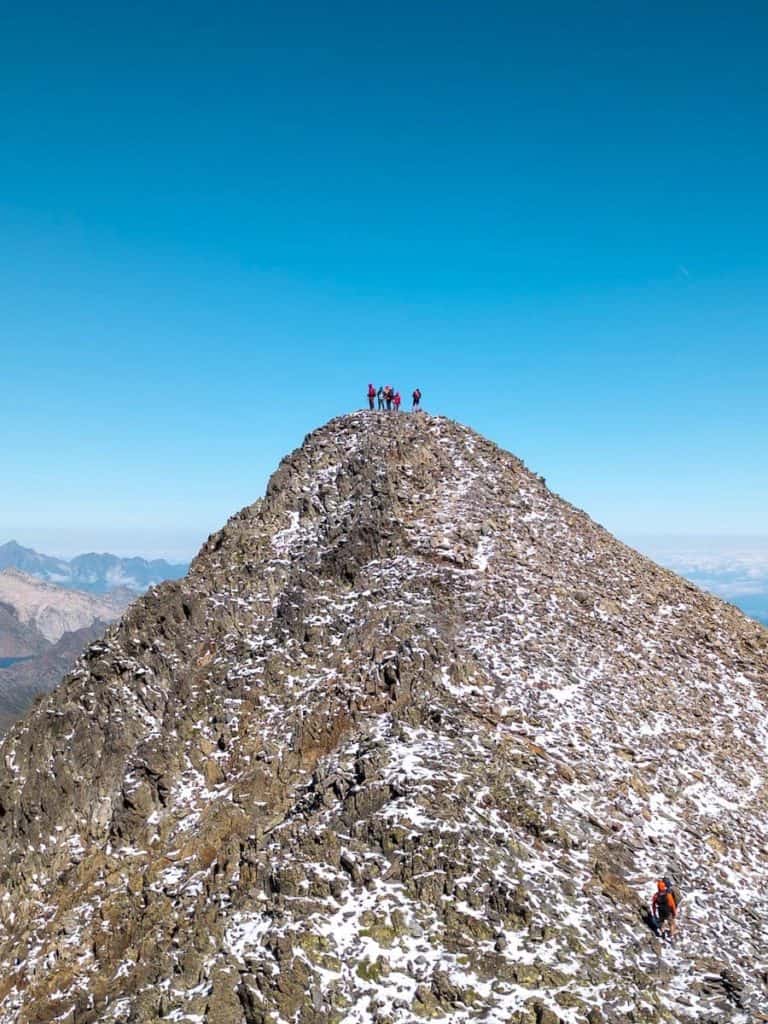
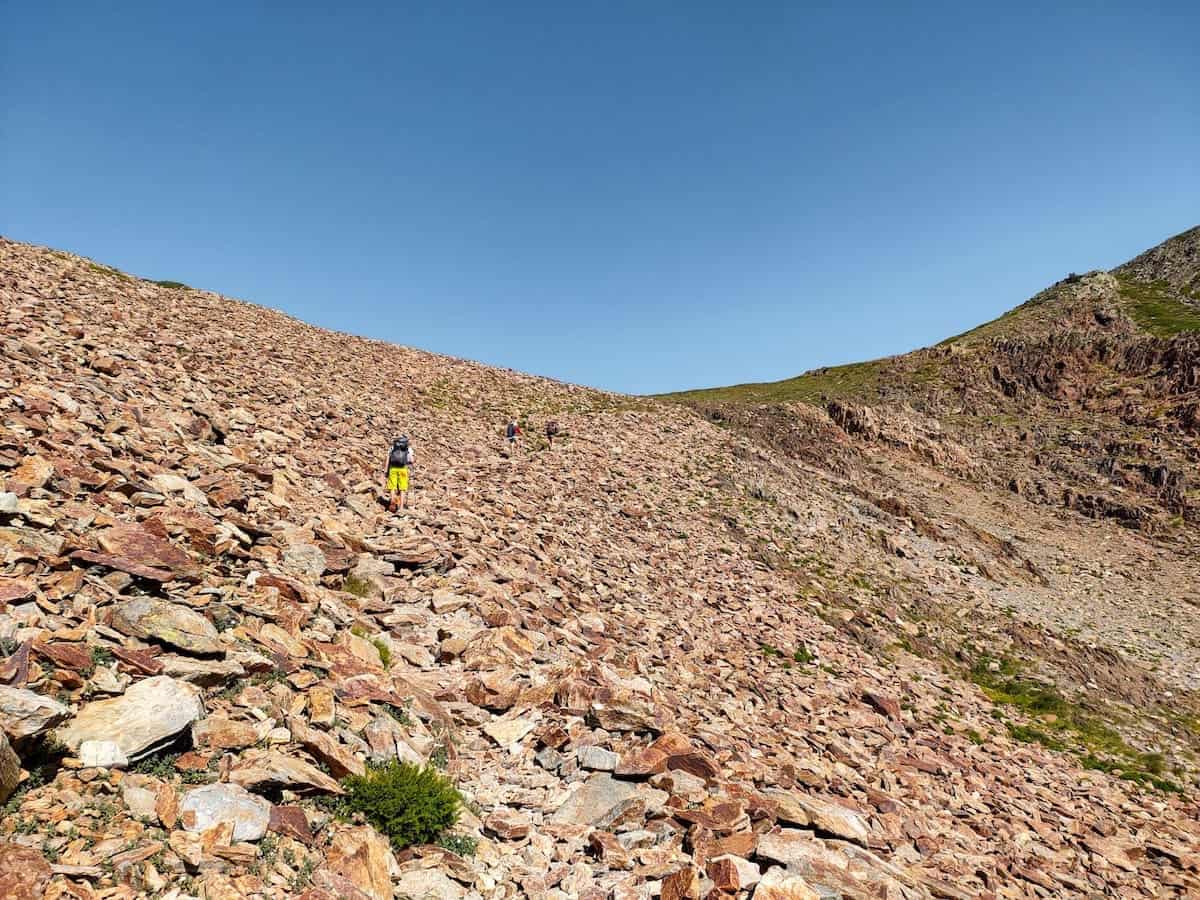
We crossed the valley, and it was time to face the last climb of the day: the ascent to the Certascan mountain pass. Save some energy during the climb because the last final stretch until reaching the Certascan peak can be tough!
Once on top of the mountain pass, you can climb the Certascan peak. We did so and can’t recommend it enough (if the weather is good, of course!).
👌 Our tip
If you decide to climb the Certascan peak, we recommend leaving your backpack at the Certascan mountain pass. You’ll have to pass by this point on the way back, so you can grab it again then. This way, you can climb the peak lighter and faster. We recommend taking a water bottle, the phone, a wind- or rain-stopper jacket (it can get windy on top), and hiking poles if needed.
It took us around 35 min to reach the peak from the mountain pass, and, wow, the climb was tough!
The ascent is steep and slippery, and once you get to the top and think you’ve already reached the peak…surprise! You still have to walk through the mountain ridge, cross an aerial pass, and climb another ascent of 73 m of elevation gain.
⚠️ Important!
To reach Certascan Peak, you have to overcome a short aerial pass. It’s not difficult, but you must use your hands and scramble, and people with vertigo might find it scary or tricky.
The views you see from before the aerial pass are very similar to the ones from the Certascan Peak (2851 m), so no worries if you decide to stop there! The risk is not worth it; you will enjoy the same breathtaking views.
And then, you made it! Once on top, you can breathe; from there to the Certascan hut, it’s all descent.
After the strenuous climb, we took some time on top to soak up the views, eat a snack, and rest for a bit.

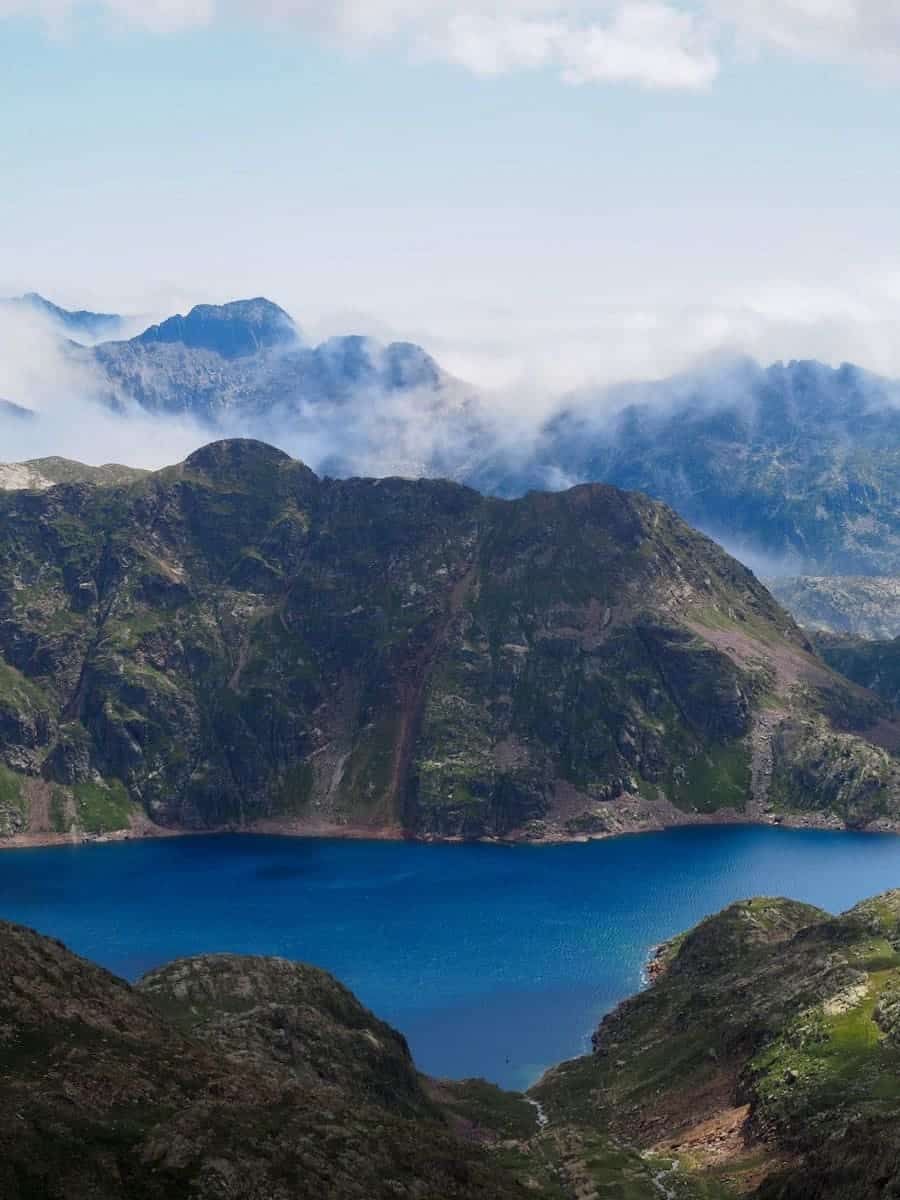
Admiring the landscape, it felt like we were on top of the world. We could see rugged mountains everywhere we looked and were only distracted by the intense blue of the Certascan and Estany Blau lakes.
The clouds started covering the sky, so it was time to descend, recover our backpacks, and make it to the end of the day’s journey.
✂️ Want to shorten this section?
You can skip the climb to the Certascan Peak and go straight from the Certascan mountain pass to the Certascan hut. This way, you’ll shorten the route more or less by 50 min and climb a total of 1250 m of elevation gain instead of 1500.
The descent to the Certascan hut was rocky but not tricky. We stopped mid-way to enjoy a much-deserved lunch sheltered from the wind.
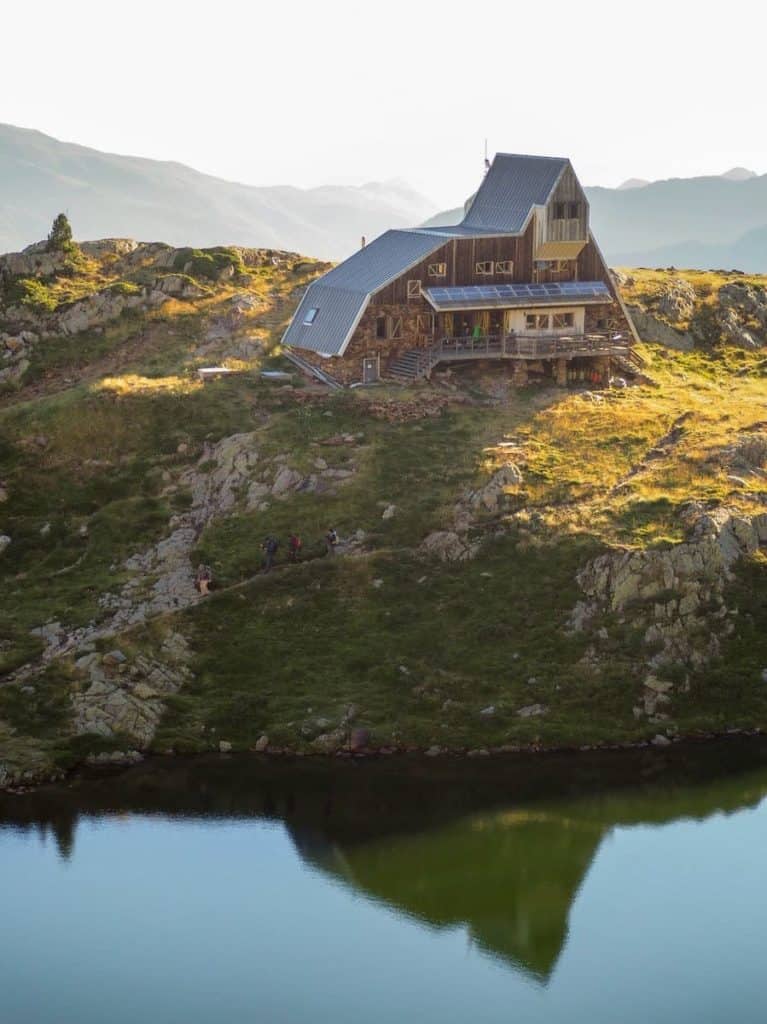
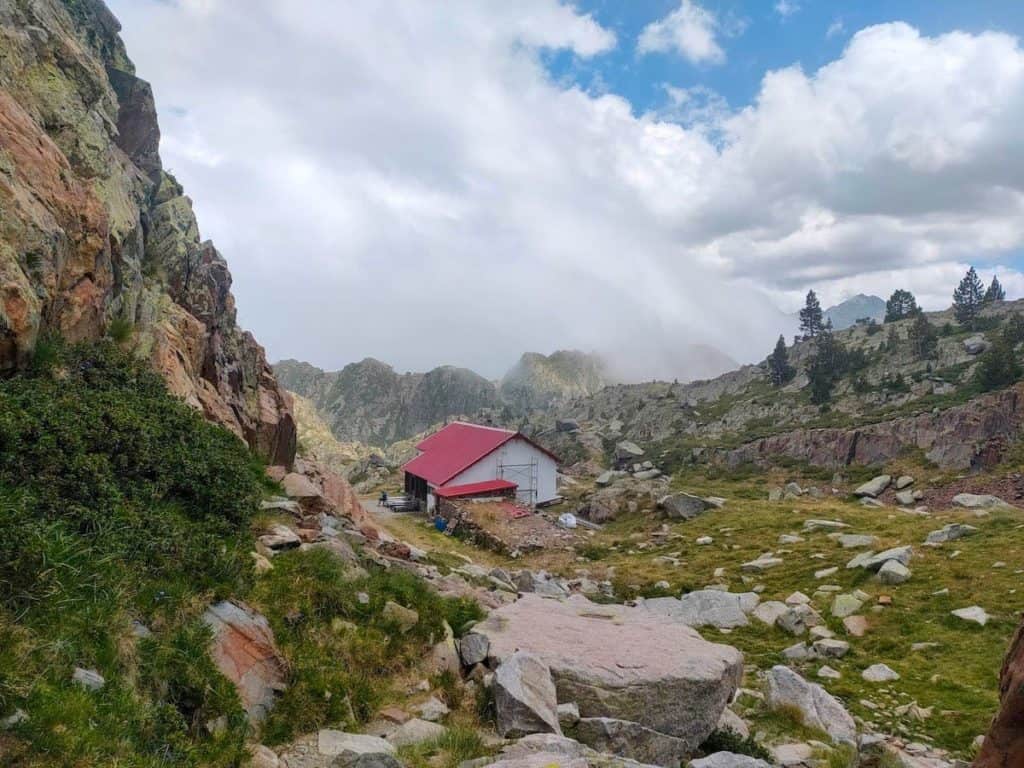
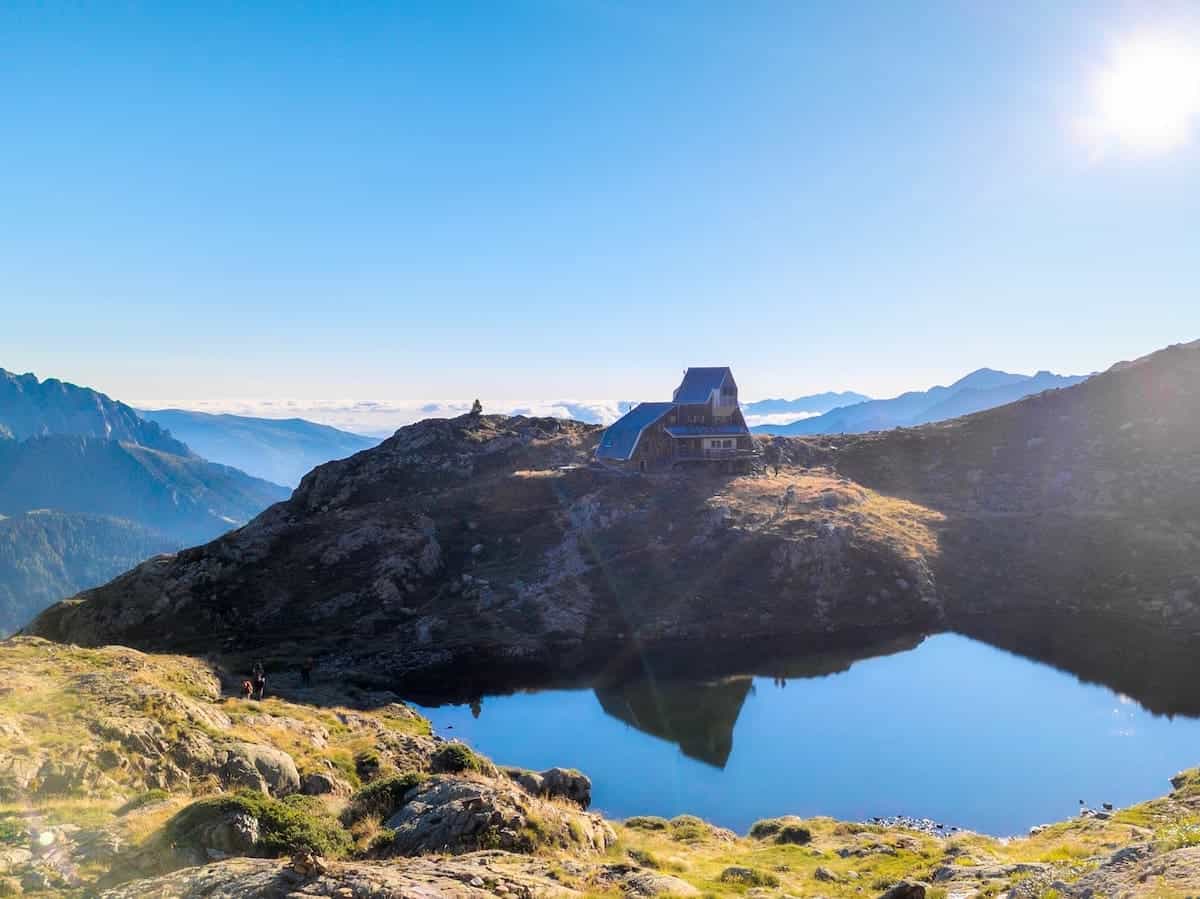
Afterwards, we continued making our way through the talus slope until we reached Certascan Lake, the largest lake in the Catalan Pyrenees and one of the deepest (96 m).
We circled the imposing lake and got to the Certascan hut, where we would spend the night. The first thing we did was take a hot shower (not included in the price) and change into clean clothes. Oh, what a feeling!
The Certascan hut is small, and because it was August, it was at its maximum capacity. Outside, it was foggy, so we spent the rest of the afternoon indoors, playing board games and drinking hot chocolate.
Dinner consisted of soup, a rice salad, meatballs with tomato sauce (they also had veggie options), and yoghurt with mango.
And so the second day ended, and it was time to rest. We shared the room with around 20 people, but surprisingly, we could sleep well!
Day 3 – Zero visibility and rain all day
Certascan hut to Pinet hut, 13 km hike, 1350 m+, 1350 m-
We’re really sorry, but the photos and explanations from this day will be few and rather poor.
As soon as we woke up and looked through the window, we saw fog everywhere. We had breakfast, which consisted of yoghurt, muesli, bread, cured meats, cheese, and biscuits (pretty complete for being a hut), and headed outside to see what the weather looked like. It was 7:30 am, and it was already raining.
The Wi-Fi wasn’t working, so we couldn’t check the weather, but after talking to the hut warden, we decided to equip for the occasion and start the hike. We wouldn’t have left the Certascan hut that day if we knew what awaited us.
Long story short, it didn’t stop raining for the whole seven hours we were hiking. As if that wasn’t enough, the temperatures dropped to 0ºC (August in Spain?!), and the wind blew strongly. We were completely soaked after a couple of hours, no matter how many waterproof layers we had.
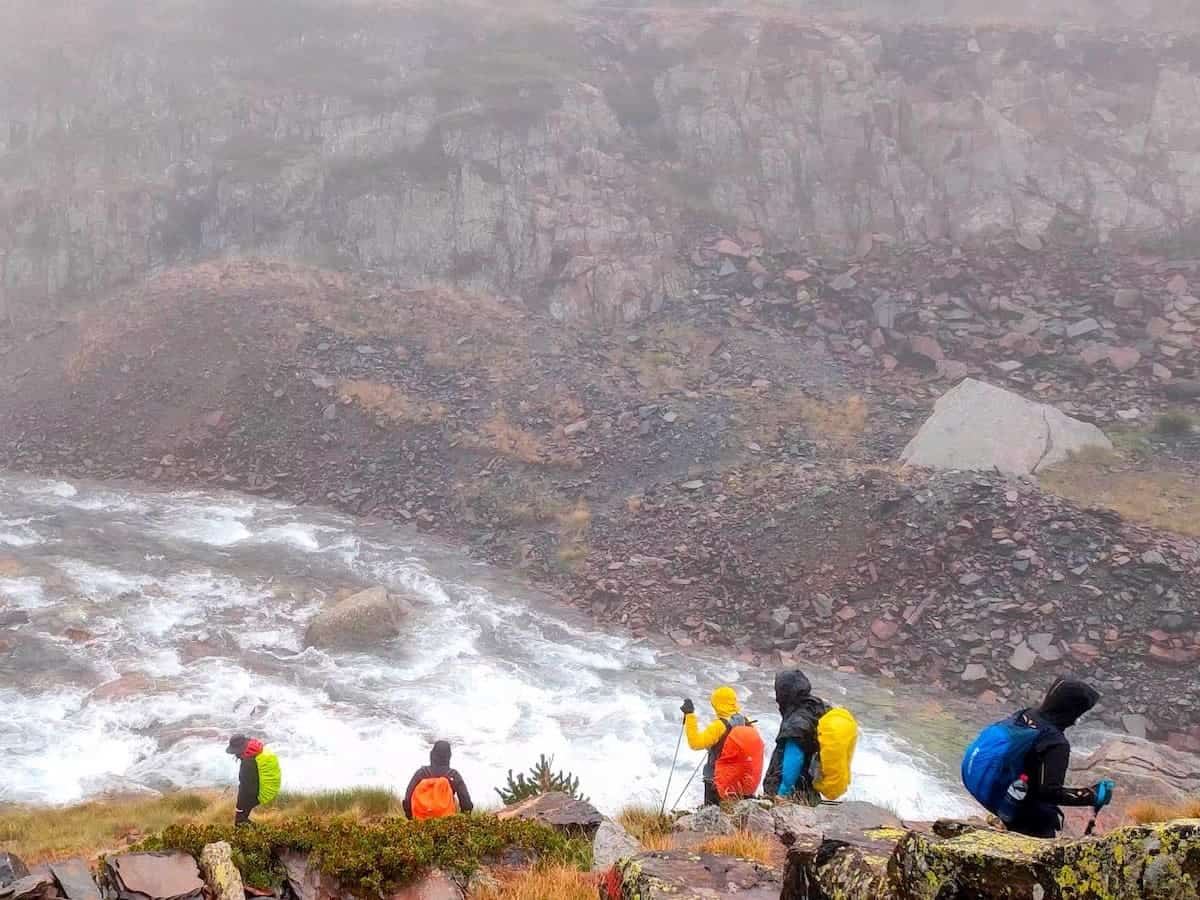
The wind and cold just made things worse, freezing our hands and feet, and later our whole bodies.
Over 13 km, we didn’t make a single stop, devouring only a few snacks as we moved. We were afraid we would get even colder if we had stopped.
We can’t tell you much about the landscape, as we didn’t see much of it. But the few we saw looked impressive. There were many waterfalls and beautiful alpine lakes.

We can tell you that a map and a GPS track are a must for this section. Once you cross into France, there are many points where the track is poorly signposted, and it’s easy to get lost. If you’re there on a day when the weather is terrible, like us, you don’t want to risk it and increase your chances of getting lost.
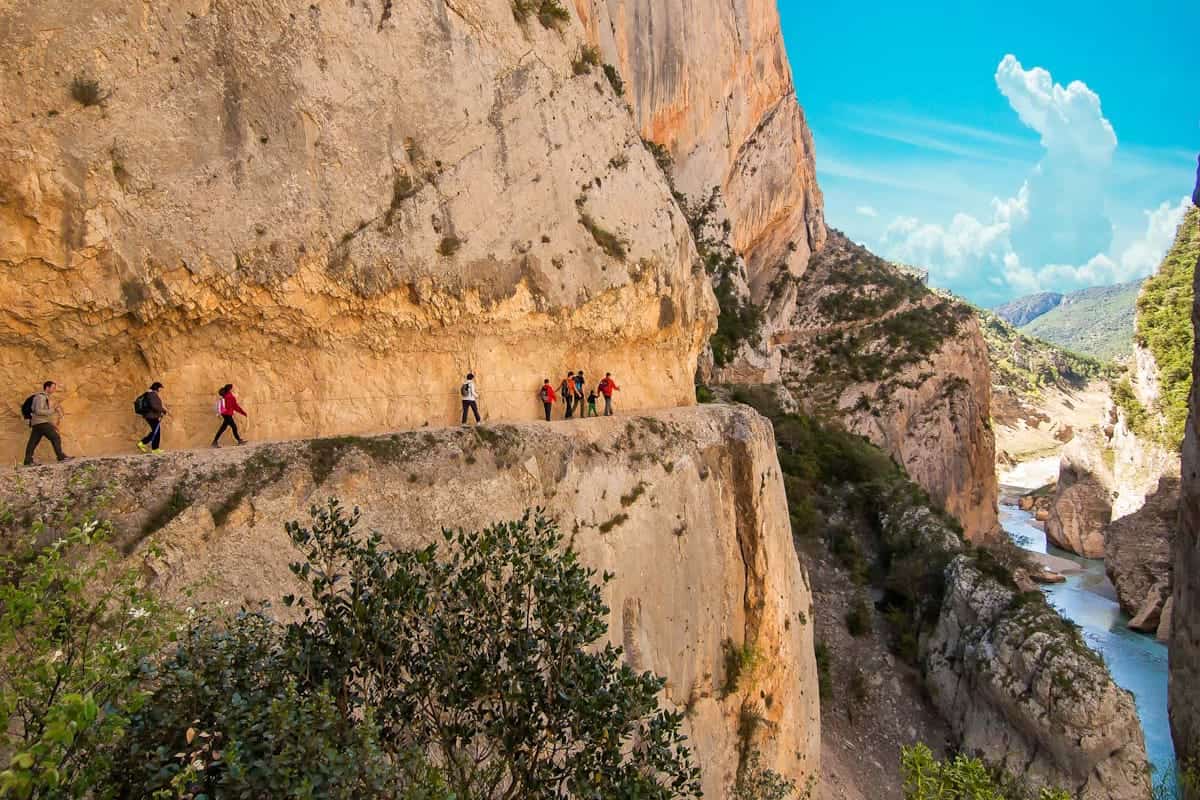
We can also tell you that this section is tough. The terrain is technical, and the elevation gain is considerable and not evenly distributed. There are two steep climbs, descents with big rocks, and two parts where you must use your hands.
After 6 hours of hiking, we finally saw the Pinet hut in the distance. We were mentally exhausted but grateful to be a group, so all the others could cheer and help when someone had a breakdown. Marc couldn’t fold the hiking poles at some point, and my sister couldn’t lace her shoes. Their hands were too cold…
And the “fun” hadn’t ended yet. Although we saw the hut, we weren’t aware that we still had a long way to go. First, we had to descend steeply between grass meadows that were super slippery that day. More than one of us ended up on the ground with clothes full of mud.
After this, it was time to ascend again through a nonexistent path. The GPS track we got from Wikiloc was really helpful in guiding us.
We could see the hut so close that we were smiling and making jokes when we realised there was a cliff in front of us and the hut was on the other side. You can imagine how the mood changed in a matter of seconds…
It was time to gather the energy we had left and make a last effort. We had to ascend a bit more and find a path that took us down to the river, where we could cross and ascend on the other side. But the ascent wasn’t a typical climb; it was a couloir equipped with a metallic cable. Time for a climb!
⚠️ Important!
If you have vertigo, you might find this last climb challenging. It’s not technically difficult, but it may be impressive if you look down. We recommend going with someone you trust and focusing on the climb, not where you are.
After all this odyssey, we finally reached the Pinet Hut. I believe it was one of the happiest moments of my life. We were safe!
Later that day, we learned they had to rescue a woman from the Pica d’Estats mountain because she had fallen and injured herself. We actually saw the helicopter near the hut. And we met many people who told us they had returned to Certascan or hadn’t left that day. Better to be safe than sorry.
The hut was a chaos of wet clothes, dirty poles, and people drying out. But it was warm, and there was food, so we were happy!
A delicious dinner, a shower, and a comfy bed were all we needed to recover. The rice with chilli and the cheese and brownie they made for dessert were excellent!
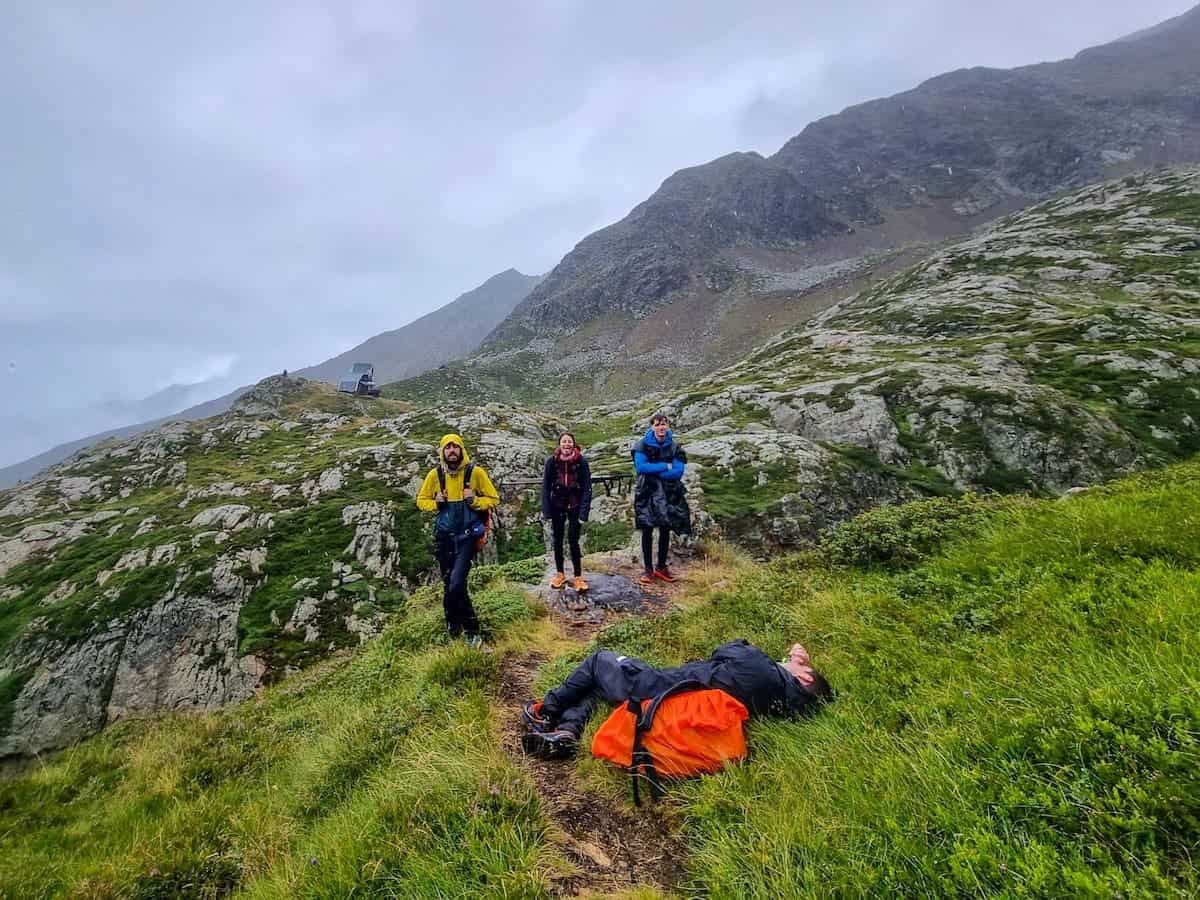
Day 4 – Summiting Catalonia’s highest peak
Pinet hut to Vallferrera hut, 13.3 km hike, 1100 m+, 1400 m-
After a superb sleep, we woke and headed straight to see if the weather had improved. Good news! There wasn’t a single cloud in the sky, and the first rays of the sun were illuminating the lake in front of the hut. Finally, we could glimpse our surroundings and see how beautiful the spot was.
We ate toast with jam for breakfast and tried to dry the still-wet clothes. The warden announced that the weather would be beautiful until noon, and the clouds would roll in later, so we’d better keep going!
As soon as we stepped outside, we could feel the cold. But it was sunny; that was all that mattered. After a km of hiking, we could finally appreciate the idyllic location of the Pinet hut.
The trail gained altitude slowly, becoming rockier after each step. Between the rocky and rugged peaks, the full moon appeared every now and then. It felt like a landscape from another planet.
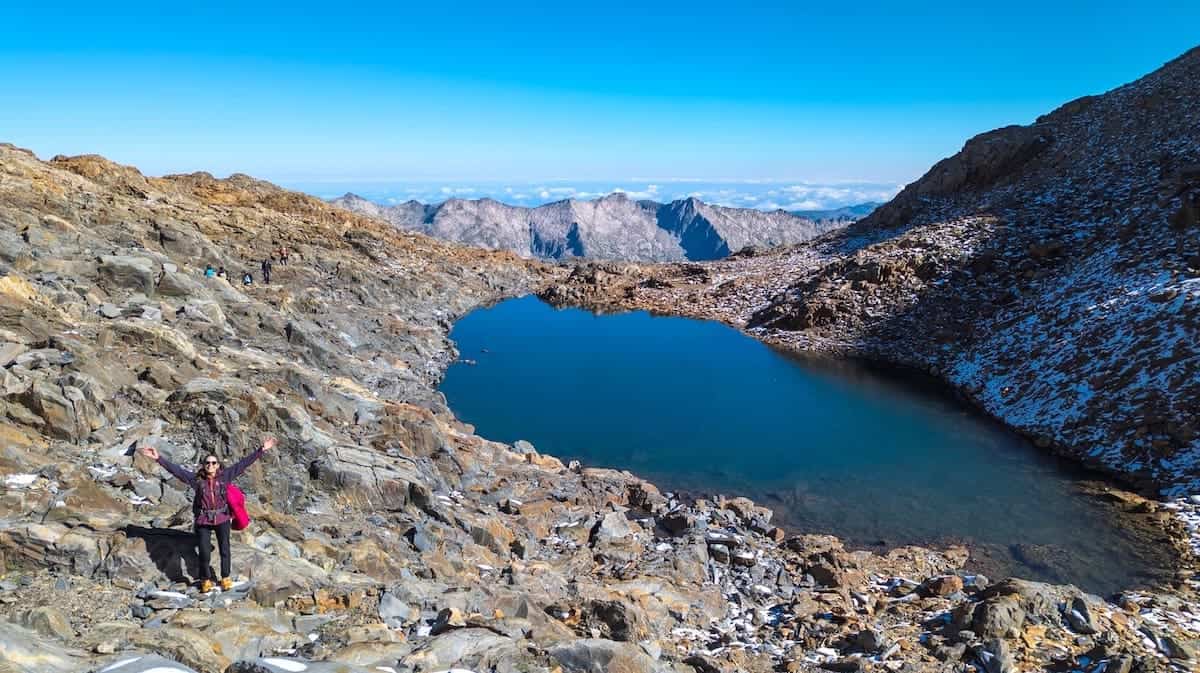
We passed by Montcalm Lake and then another small frozen lake. Here, we started encountering the snow that had fallen the day before. Yes, it was the beginning of August, and there was fresh snow! That was shocking, but it gave the landscape such a beautiful look.
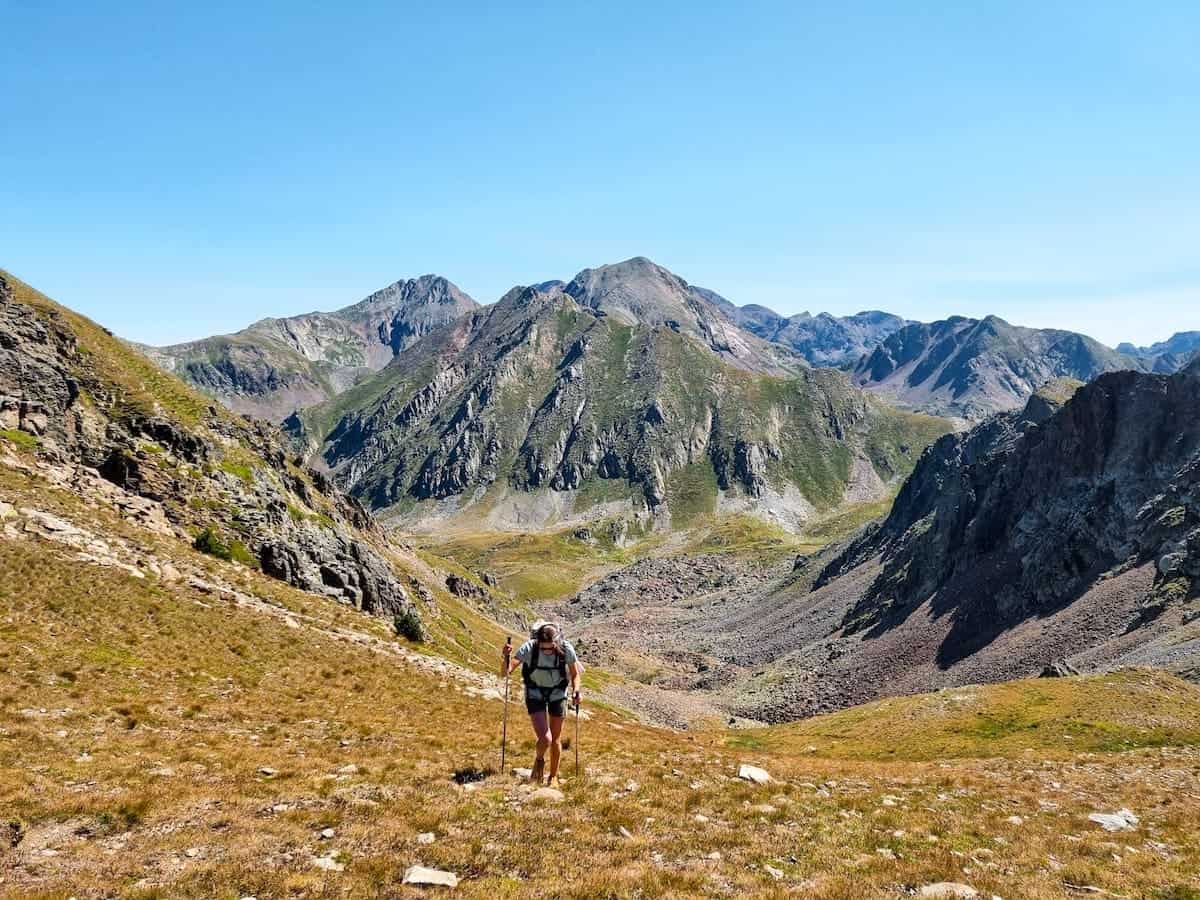
After a few km, we reached the crystal-clear Étang de la Coumette d’Estats. The view from there was breathtaking. Everywhere you looked, you saw imposing mountain peaks as far as the eye could see.
We rounded the lake, and from there, we could see the zigzag path to the Riufred mountain pass.
✂️ Want to shorten this section?
You can skip the climb to the Pica d’Estats peak and go straight from the mountain pass to the Certascan hut. This way, you’ll shorten the route by 1.6 km and climb 900 m of elevation gain instead of 1100.
👌 Our tip
If you decide to climb the Pica d’Estats or any of the surrounding peaks, we recommend leaving your backpack here before going up the Riufred mountain pass. You’ll have to pass by this point on the way back, so you can grab it then. This way, you can climb the peaks lighter and faster. We recommend taking a water bottle, the phone, a wind- or rain-stopper jacket (it can get windy on top), and hiking poles if needed.
The climb to the Riufred mountain pass wasn’t tricky, but it was cold and windy that day.
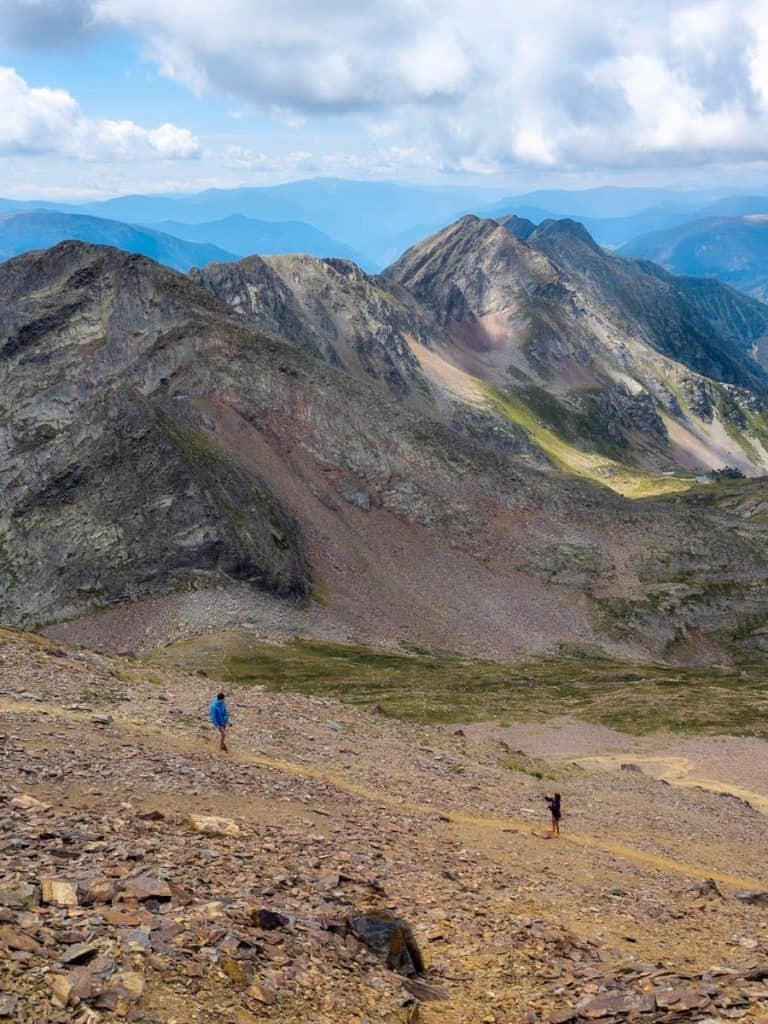
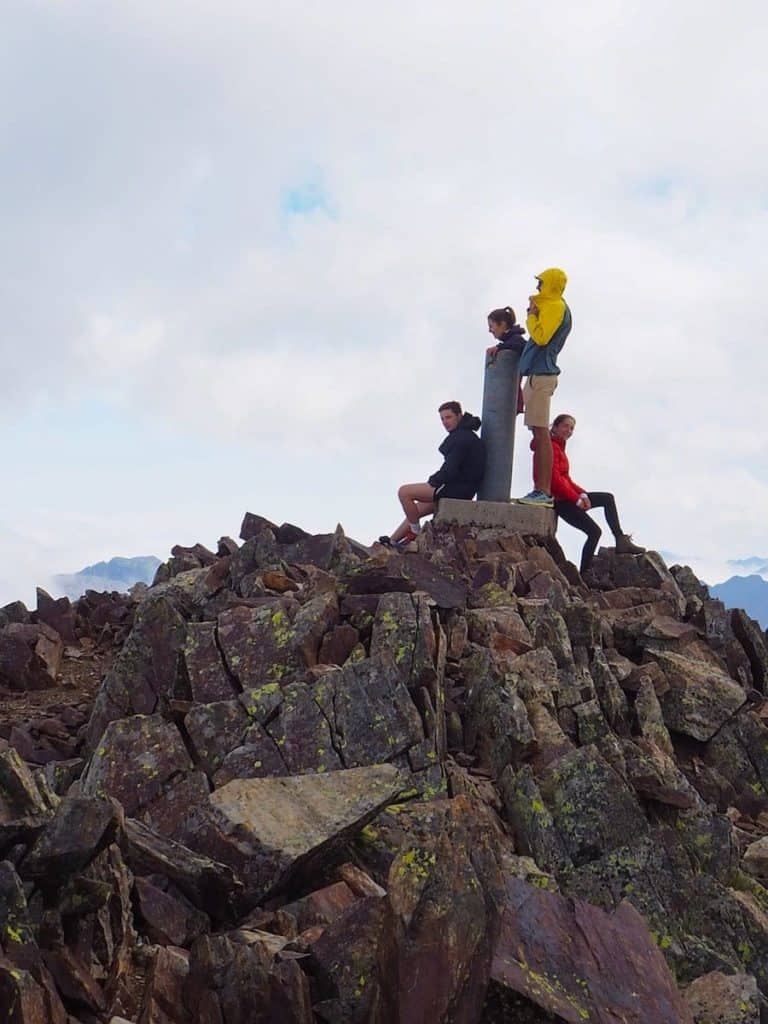
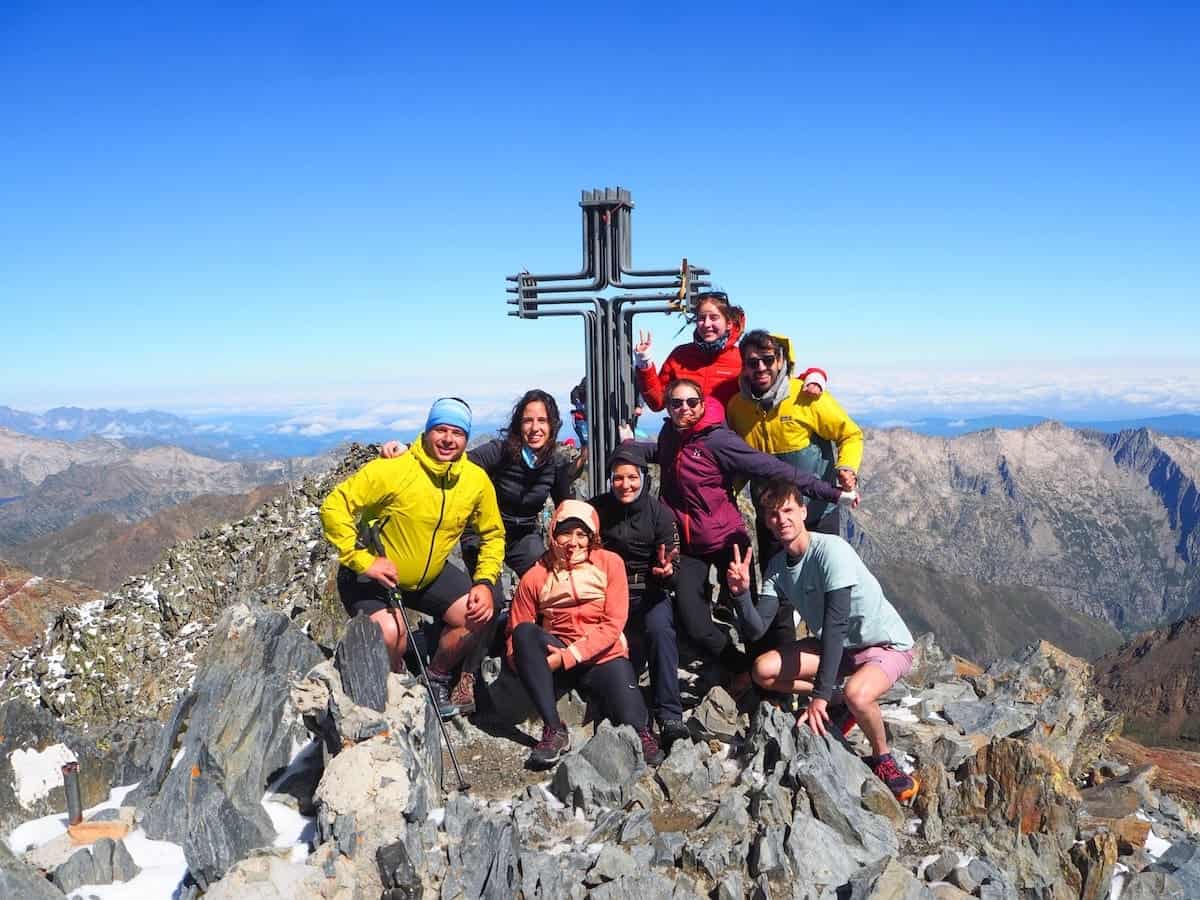
Once on top of the mountain pass, the well-marked path continues climbing gently until reaching the highest point in Catalonia: the peak of La Pica d’Estats. We made it!
We had been encountering the same group of hikers at all the huts, who had become friends, and it was really special to summit the peak together.
This mountain delimits the border between France and Catalonia. The 360 ° views from there are hard to beat! You can contemplate the Pyrenees’ vastness and see mountains belonging to three different countries: France, Spain, and Andorra.
🏔 Want to climb more than one 3000 m peak in this section?
Once on the Riufred mountain pass, you have the option to climb three peaks that are higher than 3000 m. If you go right, you’ll find La Pica d’Estats (3143 m) and Pic Verdaguer (3129 m). It takes 10 min to hike from one to the other. If you go left on the top of the mountain pass, you’ll be climbing Montcalm (3077 m).
After soaking up the views, we descended the peak the same way until we got to the spot where we left our backpacks. The path continued towards the breathtaking Barz Lake. However, you don’t go down to the lake but admire it from a distance.
And here came the last ascent of this section to the mountain pass Port de Sotllo. Although it was only a 100 m elevation gain, it felt tough! Nonetheless, you forget everything once you get to the top and see the views on the Catalan side! White snow at high altitudes, green meadows at the bottom, and a beautiful blue lake.
It was time to say goodbye to France and descend to the next hut. As it was Saturday, we found many people climbing La Pica d’Estats from the Catalan side while descending.
The descent through the scree was strenuous, but step after step, we found ourselves next to Estats Lake. We passed it by, and once we reached the next lake, Sotllo Lake, we stopped for a break. We ate lunch, sunbathed for a while, and recovered energy for the last part of the section.
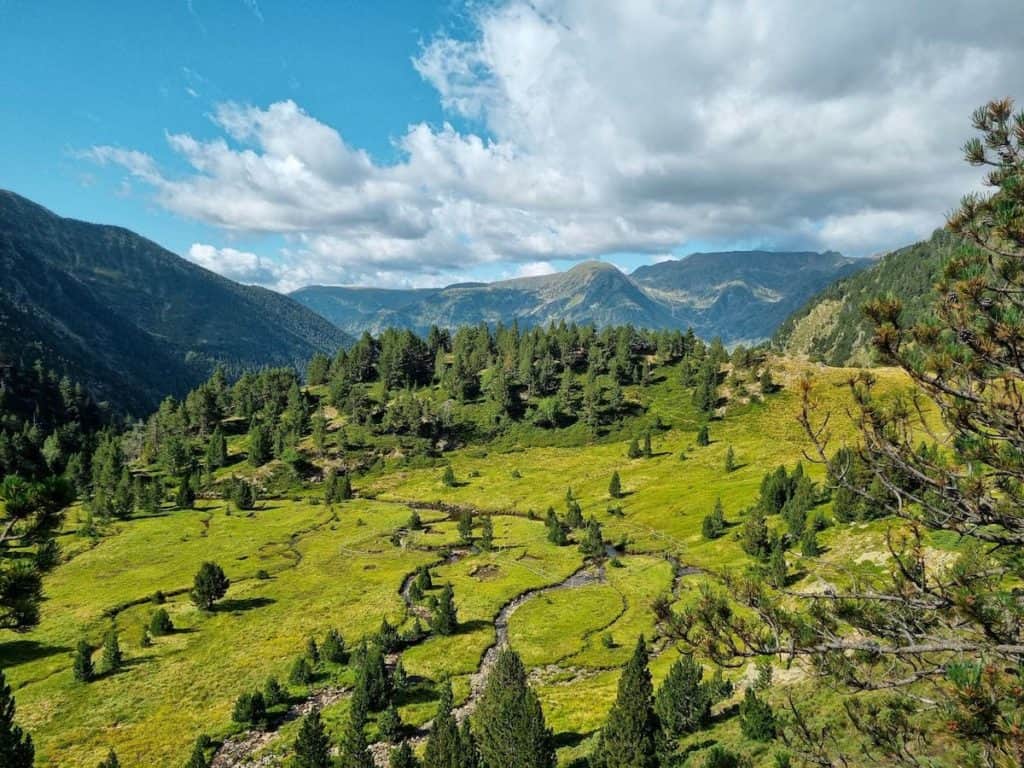
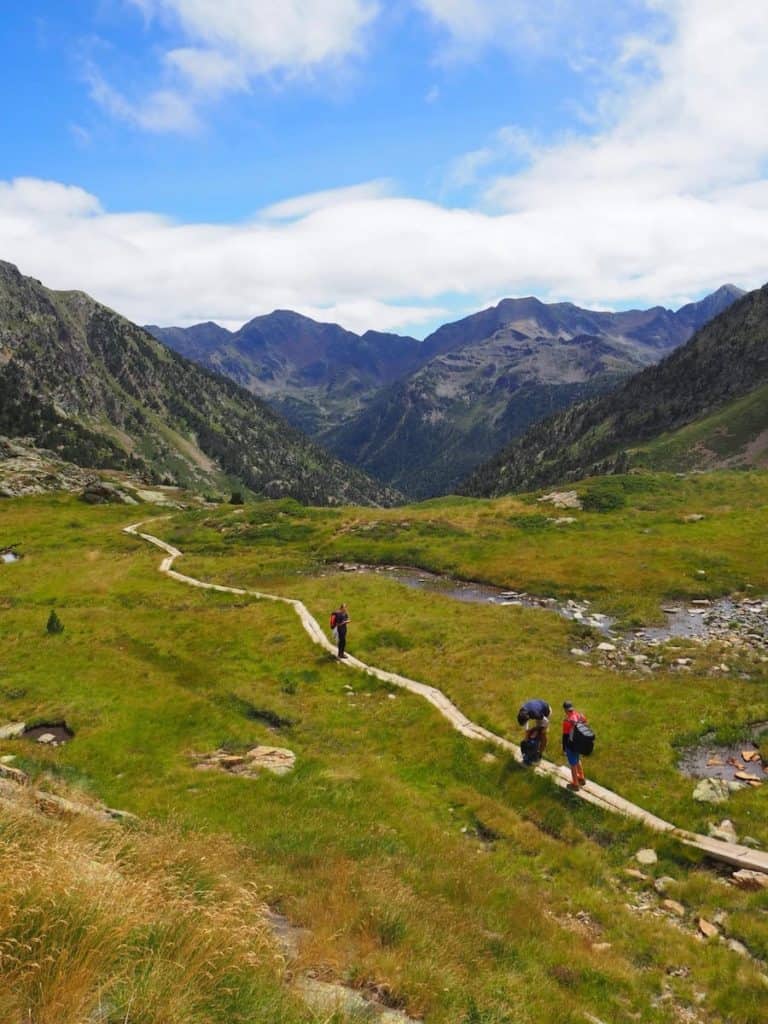
Most of the km that followed were through wetland areas, with wooden paths installed to preserve the environment’s fragility (and not to get wet!).
Then, the landscape changed, and we entered a thick forest. Soon, we encountered a section equipped with a chain that had no difficulty.
The last km until the hut were tedious and seemed to never end. But when you’ve had enough hiking and just want to stop, the Vallferrera hut finally appears in the middle of the path!
What we loved the most about the Vallferrera hut were the showers! Excellent water pressure and temperature 100% adjustable. We take those things for granted, but they really are a pleasure!
After a great shower, we enjoyed drinks outside while waiting for dinner. It was zucchini soup, sausages with tomato sauce, and yoghurt.
And so the fourth day ended, and it was time to rest.
Day 5 – Unexpected beauty and goodbye to La Porta del Cel
Vallferrera hut to Tavascan, 19.3 km hike, 1215 m+, 2000 m-
After a not-so-great breakfast of mainly industrial pastries wrapped in plastic, we packed everything and got ready for the last hiking day of this journey.
We had a long day ahead, and the hike seemed challenging due to the distance, elevation gain, and loss.
Initially, the path was a wide track used by cars to reach a nearby parking lot. After a few km, we left the track and entered a beautiful forest. The trail began to ascend slowly, and soon we found a little cabin known as Cabana de Bassello.
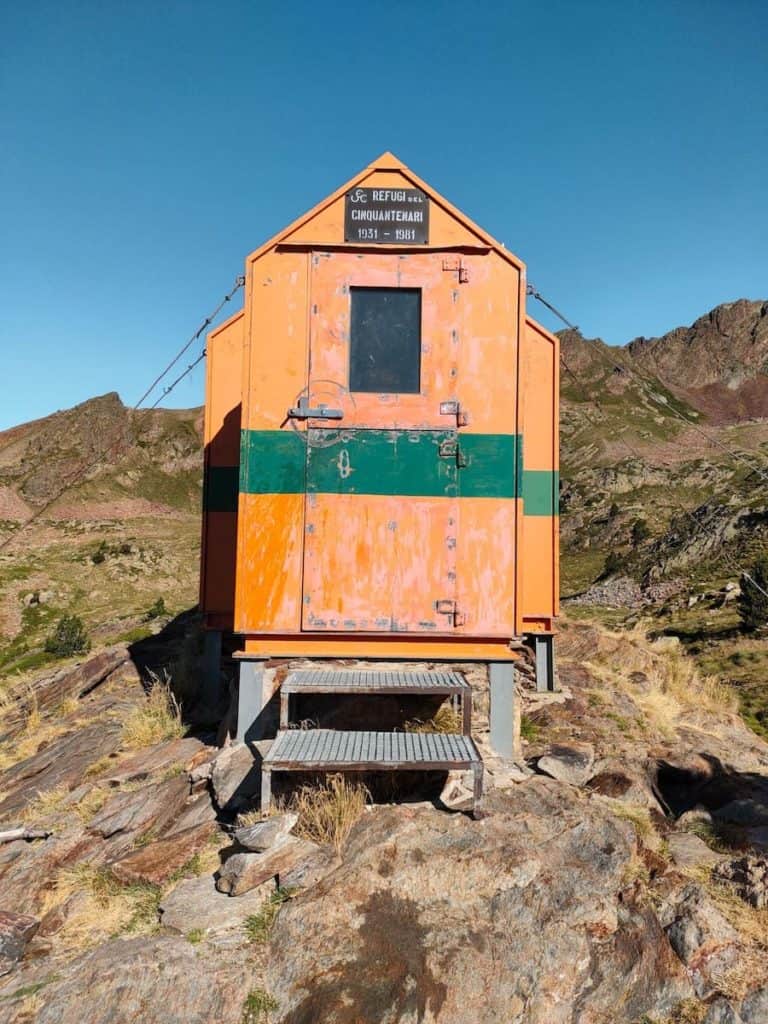
After more or less one hour of intense climbing, we found the first highlight of the day: Baborte Lake. In the distance, we could already spot the orange, unguarded hut that provides shelter for hikers looking to spend a night in the wild.
From there, we could already see the mountain pass we had to cross, and it looked steep! Luckily, the views during the climb were fantastic, and we soon got to the top of the Sellente mountain pass.
Time to descend to the Sellente Valley, but not for long. After 20 min, it was time to pay attention to not miss the track because it wasn’t obvious. Instead of going down the valley, we crossed the river towards a climb with big rock blocks.
At this precise moment, we heard a sound and saw two beautiful groundhogs right in front of us! And instead of hiding, they stayed there for quite a while so we could contemplate them thoroughly! It was magical.
Check out our “Stepping outdoors 101: How to enjoy nature responsibly and be safe out there” guide for some tips on how to have a great time watching wildlife without bothering them.

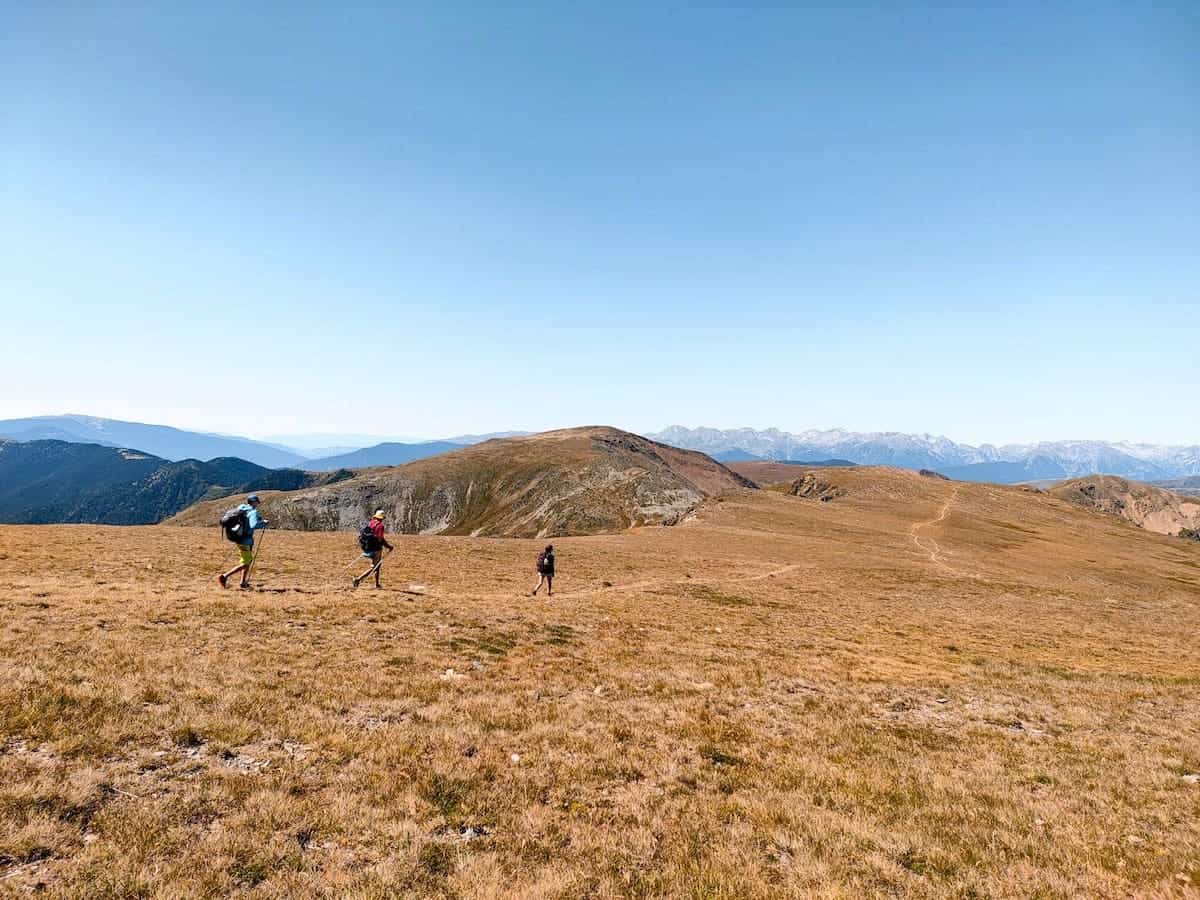
The climb wasn’t technical, although it was rocky. In the last part, the rocks transformed into steeper grassy slopes, but we were soon at the Llacuna mountain pass.
From here, we could see the grassy, wide ridges we had to follow to get to the next highlight: Roca Cigalera, a 2667-m peak.
The trail to the peak was stunning. We didn’t expect to suddenly find a flat meadow at such an altitude, which was mind-blowing. The views were also incredible. You could spot Certascan Lake, where we hiked the second day, the snowy mountains of the Val d’Aran, and several ski resorts.
Now, we only have around 2000 m of elevation loss to Tavascan. The variety of landscapes made the 3 hours of descent quite entertaining. The first part followed the grassy ridges for a while longer and was beautiful. Later, we descended to a valley, where many horses roamed freely and enjoyed the sunshine.
The trail entered a thick forest, and we decided it was a nice place to rest.
After a much-deserved lunch break, we continued our journey to the point where we started the route five days ago. This last bit was pretty monotonous and tedious. The path wasn’t well-maintained, which made it difficult to advance at a fast pace.
After a while, we could already spot Tavascan again. The end was close, or so it seemed… We still hiked for an hour from the first time we saw the village until we arrived.
But step after step, we got closer to the village until we finally reached the parking lot where we started this adventure. Although exhausted, we couldn’t help but cross the last bridge, jumping and hugging each other!
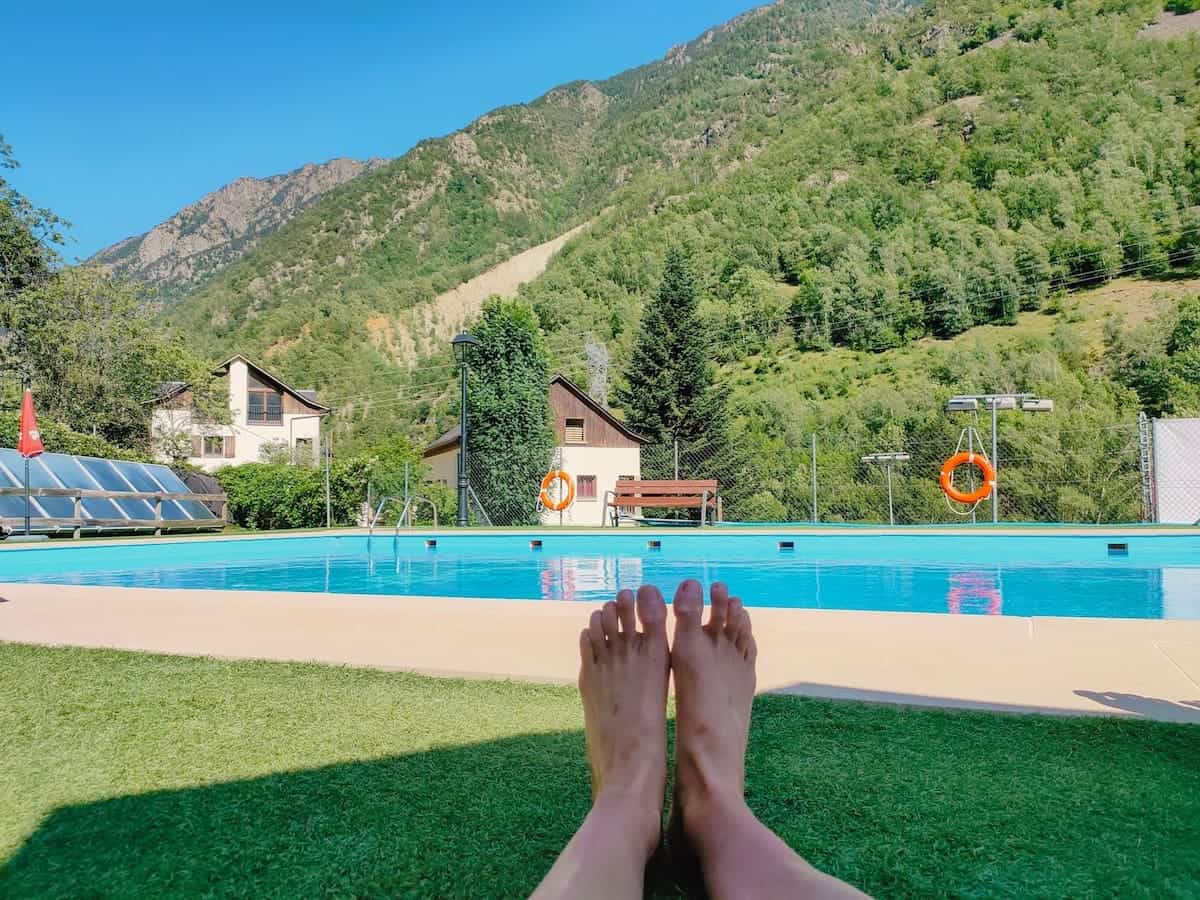
It was scorching, and we only wished to swim in the pool of Tavascan that we spotted from the mountain. And so did we! It was the perfect way to end the hike. The entrance only costs 2 €, and it’s super well-maintained.
Once refreshed, we went for a drink to celebrate having made it.
Because we didn’t want to drive after such an intense day, we booked a room at the Hotel Llacs de Cardós in Tavascan. We enjoyed a much-deserved siesta and then had dinner at the hotel.
Day 6 (additional day) – Time to rest
How good it felt to wake up without an alarm clock! We slept like babies for 10 hours and then went straight into the hotel’s dining room to enjoy the buffet breakfast. It was excellent: cured meats, yoghurt, bread, cheese, eggs, muesli, nuts,…you name it!
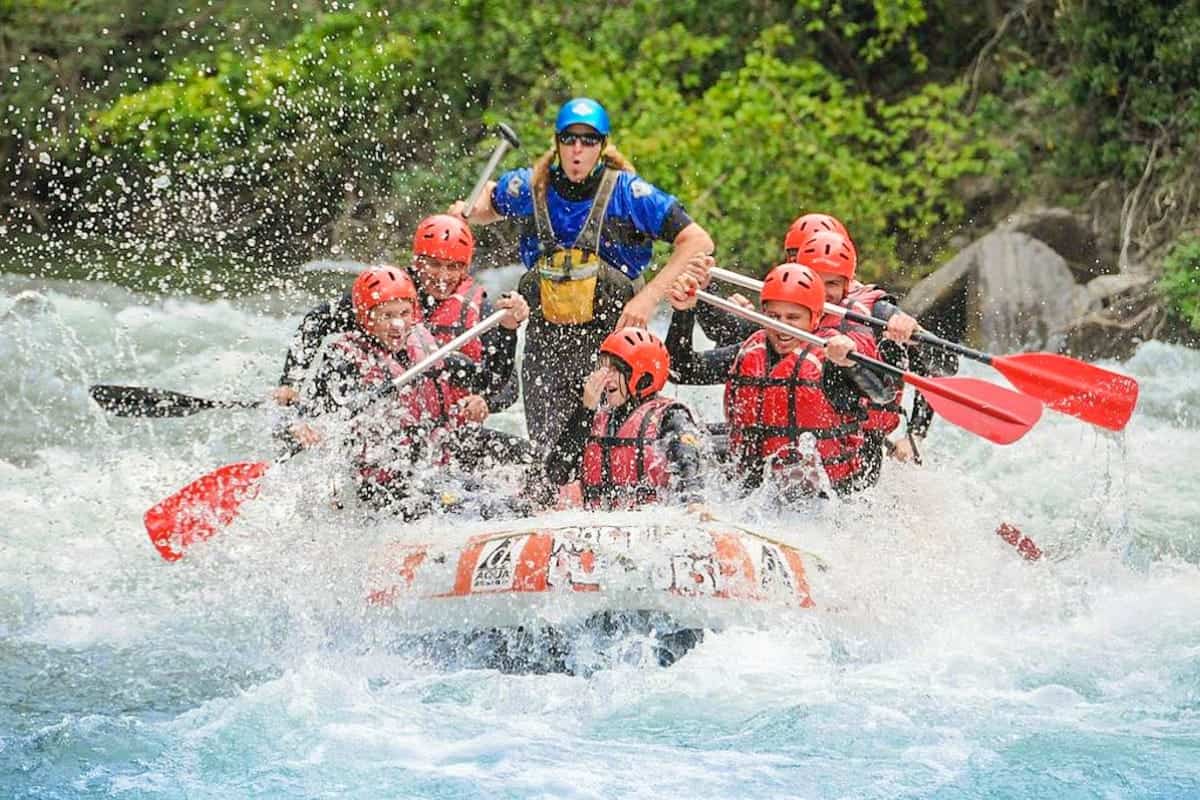
The day was beautiful, and although we had already been to the area several times, we decided to explore it further. The last time we were there, we did canyoning, an incredible via ferrata, and a beautiful hike.
This time, though, we decided to do something more chill. We drove to the village of Ribera de Cardós and took an easy hike along the river to Ainet de Cardós. Once there, we bought some food at Cal Joanet, a little shop that sells many local products (highly recommended if you want to bring a souvenir), and enjoyed it near the river.
We liked the pool in Tavascan so much that we spent the afternoon there again, chilling, reading, and swimming.
And the last thing we did before leaving was to check out El Forn. This place was on our radar for a long time, but we hadn’t had the opportunity before to check it out. And it didn’t disappoint one bit!
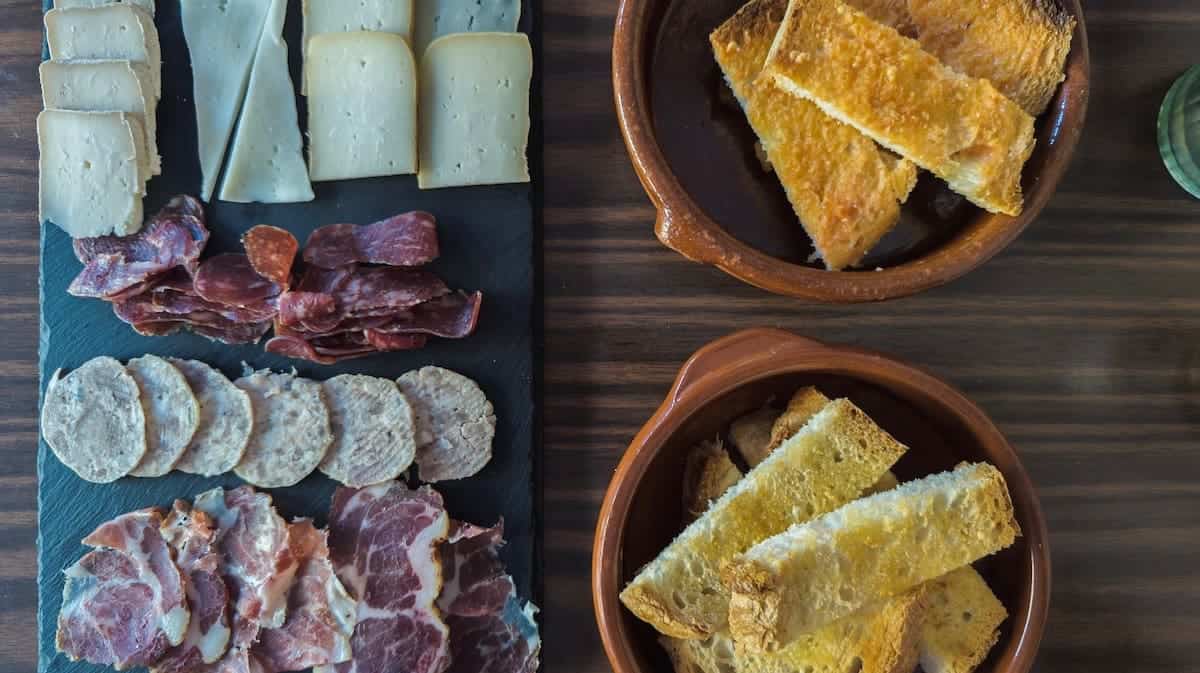
The place used to be a bakery run by Antonio, but it closed after a while. In 2021, Antonio’s grandchildren decided to reopen it. They turned it into a gastro bar where you can enjoy local food, artisan beer, and wine. We tried a lot of tapas and loved all of them!
Our favourites were “L’Antonio” (toasts with quince, Roquefort cheese, and chopped almonds) and “Mossegada Calenta” (bread with blood sausage and local cheese). We also tried a cheese and cured meats platter, and it was delicious.
All in all, it was the perfect way to finish this adventure!
Would we recommend La Porta del Cel?
100%! The landscapes were among the most impressive in the Catalan Pyrenees, and we loved how varied the itinerary was, with lush green forests, rocky peaks, and incredible alpine lakes.
La Porta del Cel is not a route for someone who wants to get started with hut-to-hut hiking (for that, we recommend La Travessa dels 3 Refugis). But you’ll love it if you’re a seasoned hiker with experience in high altitudes.
Also, if you’re thinking about doing it alone, go for it (as long as you’re prepared!). We met many people along the trail and made a couple of friends with whom we did some parts of the route together.
A bonus from this route is that you get to climb Catalonia’s highest mountain, La Pica d’Estats, but you also do it in a more entertaining way. Most people climb it from the Catalan side, so you ascend and descend following the same path, which can become monotonous. Following La Porta del Cel, you climb on the French side and descend on the Catalan one, allowing you to find fewer people and admire more landscapes. It’s a win-win!
All in all, La Porta del Cel is perfect for experienced hikers who want to enjoy a multi-day hike while enjoying the comforts of staying in a hut, carrying less weight, and eating delicious, abundant food!
Remember to follow Leave No Trace practices. Be kind to fellow hikers, hut wardens, and the local communities. And hike on!
More hut-to-hut hiking routes in the Catalan Pyrenees
Check our “Hut-to-hut hiking in the Pyrenees: Seven stunning routes + Essential info” guide to discover more thru-hikes in the Catalan Pyrenees. We hope you enjoy them!

We have never hiked the Pyrenees before and this sounds like the most exciting trail of the ones you describe. I’m interested to get a feel for how tough this trail is compared with other high trails we have done and whether we could handle it. For example is it much, much more challenging than the Laugavegur trail in Iceland?